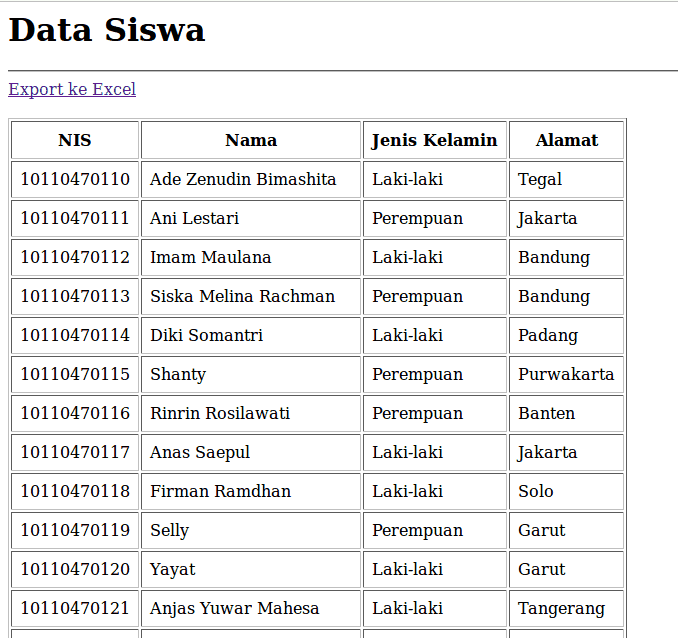
Export MySQL Table to Excel in PHP
We can use the excel headers in PHP to import the table in MySQL into an excel file. We should specify the header as to include the excel header. To download the excel file, we should use the header as an and provide the filename with the option. We can query the required table in PHP and save the result in a variable. The variable should be an HTML table containing the queried results. Then, we can send the header information to the browser using the function and output the variable containing the table using the function. We will break down the steps to export a MySQL table into an excel file.
For instance, we have a table named in our database.
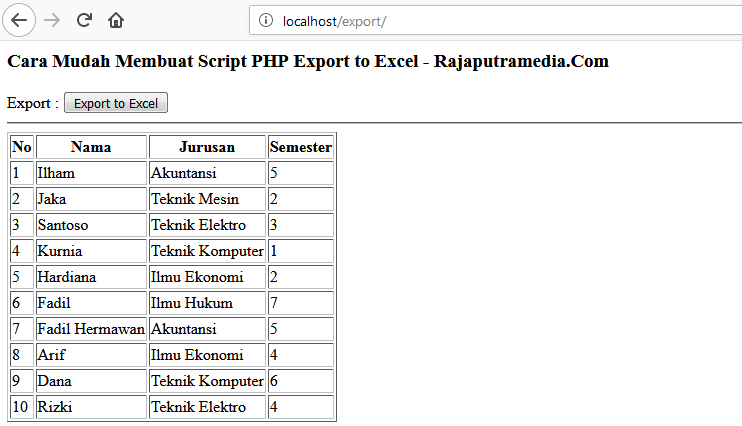
Now, we will export the table into an excel file. At first, let’s create a button to export the table into excel.
We created a form that submits the data to the file when the button is clicked. The attribute of our button is . We will use this value later to check if the data has been submitted in the form.
At first, we have to establish a connection to the database. For that, use the function and provide your server details. Save the connection in the variable.
Note that the values written as the parameters to the function above are merely placeholders. You should fill it with your server information.
Next, we can use the function to check if the form has been submitted. As the attribute is in the form that we created, we should use the array to check. We use the attribute’s value, as the index of the array inside the function.
After that, write the SQL query and save the output in the variable. The query to select all the rows from the table is below.
Then, run the query using the function. The database connection variable is the first parameter in the function, and the MySQL query is the second parameter. We can check the query result using the function. The function returns the number of rows from the database. The number of rows must be greater than zero to execute further operations. Write the condition to evaluate the condition.
Inside the condition, create a variable and save the HTML table in it. Create the table headers with the tag. Create the headers with the same name as the column names in the table. After that, fetch the data from the database using the function. Assign the function to a variable.
Next, use the variable to extract the data using the column name as the index. Wrap the variable inside the tag so that the data will be populated in the table. An example is shown below.
Next, close all the table tags. The variable contains the table as a string. Next, write the function to denote the content sent to the browser as an excel file. Again, use the function to download the excel file. The example is shown below.
Finally, print the variable using the function. Note that all the PHP part is done in the file.
The final code example is shown below.
Example Code:
Импорт Excel листа в phpMyAdmin
В настоящее время я играю с phpMyAdmin и столкнулся с проблемой. При импорте моего CSV в phpMyAdmin он округляет числа. Я установил столбец как плавающий, а столбец в Excel — как число (также попробовал text/General) безрезультатно. Кто-нибудь еще сталкивался с этой проблемой и нашел жизнеспособный обходной путь?
Второй вопрос: Могу ли я загрузить файл CSV так, чтобы он соответствовал именам столбцов в phpMyAdmin-Excel именах столбцов и вводил данные в правильный столбец?
3 ответа
Я хочу импортировать из формата листа excel (. xls) в базу данных mysql через опцию импорта phpmyadmin. Я понимаю, что нам нужно сначала преобразовать формат в формат csv, прежде чем мы сможем импортировать его в формат phpmyadmin. Но, к сожалению, если я изменюсь на csv, какой-то специальный.
Есть ли способ, с помощью которого я могу импортировать книгу excel, которая имеет несколько листов в базу данных mysql, в несколько таблиц? Что означает, скажем так У меня есть рабочая тетрадь excel с 3 листами под названием sheet1, sheet2 sheet3. Заголовки для каждого листа находятся в первой.
- Ваш файл должен выглядеть следующим образом(десятичные поля имеют общий тип):
- Сохранить как CSV. Файл, вероятно, будет сохранен с помощью; separated
Это для новой таблицы:
- Откройте phpMyAdmin, выберите свою базу данных, нажмите кнопку Импортировать и выберите файл для загрузки
- Измените формат на CSV, если он не выбран
- Изменение конкретных параметров формата-столбцы, разделенные: ;
- Убедитесь, что checkbox (первая строка файла содержит имена столбцов таблицы (если этот флажок снят, первая строка станет частью данных)) — это SELECTED
- Нажмите Кнопку Перейти
- Новая таблица будет создана со структурой в соответствии со строкой forst в CSV.
Это для существующей таблицы:
- Откройте phpMyAdmin, выберите свою базу данных, выберите таблицу , которая соответствует структуре импортированного файла, нажмите кнопку Импортировать и выберите файл для загрузки
- Измените формат на CSV, если он не выбран
- Изменение конкретных параметров формата-столбцы, разделенные: ;
- Измените число пропусков запросов на 1 (это позволит пропустить первую строку с именами столбцов)
- Нажмите Кнопку Перейти
- Выбранная таблица, имеющая ту же структуру, что и CSV, будет обновлена, а строки в CSV вставлены.
Мало букафф? Читайте есчо !
Как в PHP сделать буквы заглавными?
Сентябрь 13, 2016 г.
PHP обладает целым арсеналом работы со строками. Сделать буквы заглавными или наоборот перевести в строчные – нет ничего проще.Базовый набор функций для работы со строками содержит такие функции как:string strtolower ( string $string );- …
Читать
Генератор случайной строки в одну строку кода на PHP
Ноябрь 21, 2018 г.
Задача генерации случайной строки возникает часто в алгоритмах связанных с безопасностью.Начиная с версии PHP 5.3, стала доступна функциякоторая позволяет генерировать цепочку псевдослучайных байтов произвольной …
Читать
Exporting to CSV format
As newer versions of Excel are becoming fussy about opening files
with a .xls extension that are not actual Excel binary files, making CSV
format with a .csv extension is now a better option.
The tab-delimited text options describe above may be a bit limiting
if your data contains newlines or tab breaks that you want to preserve
when opened in Excel or another spreadsheet application.
A better format then is comma-separated variables (CSV) which can be
generated as follows:
Normally the fputcsv command is used to write data in CSV
format to a separate file. In this script we’re tricking it into
writing directly to the page by telling it to write to
php://output instead of a regular file. A nice trick.
click here to trigger CSV download
source
As an aside, to export directly to CSV format from the command line
interface in PostgreSQL you can use simply:
and for MySQL, something like the following:
Php export data from mysql to excelif(typeof ez_ad_units != ‘undefined’){ez_ad_units.push([[580,400],’tutorialsplane_com-medrectangle-3′,’ezslot_8′,113,’0′,’0′])};__ez_fad_position(‘div-gpt-ad-tutorialsplane_com-medrectangle-3-0’);
Here are steps to export data from mysql to excel using PHP Script.
Table
First specify the table from which you want to export data in excel. Here we have created a script to create table in mysql. First of all please run the below script to create the table and insert the sample data so that we can proceed for php code which will pull data from this table and export it into the excel file.
Create My-Sql Table:
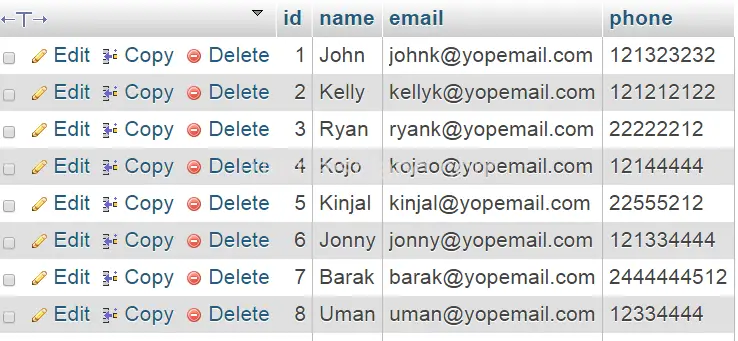
CREATE TABLE IF NOT EXISTS `test_user` ( `id` int(11) NOT NULL AUTO_INCREMENT, `name` varchar(50) NOT NULL, `email` varchar(50) NOT NULL, `phone` varchar(15) NOT NULL, PRIMARY KEY (`id`) ) ENGINE=MyISAM DEFAULT CHARSET=utf-8 AUTO_INCREMENT=8; -- -- Dumping data for table `test_user` -- INSERT INTO `test_user` (`id`, `name`, `email`, `phone`) VALUES (1, 'John', 'johnk@yopemail.com', '121323232'), (2, 'Kelly', 'kellyk@yopemail.com', '121212122'), (3, 'Ryan', 'ryank@yopemail.com', '22222212'), (4, 'Kojo', 'kojao@yopemail.com', '12144444'), (5, 'Kinjal', 'kinjal@yopemail.com', '22555212'), (6, 'Jonny', 'jonny@yopemail.com', '121334444'), (7, 'Barak', 'barak@yopemail.com', '2444444512'), (8, 'Uman', 'uman@yopemail.com', '12334444'); |
After running the above query in mysql you will have a table named test_user with above sample data.
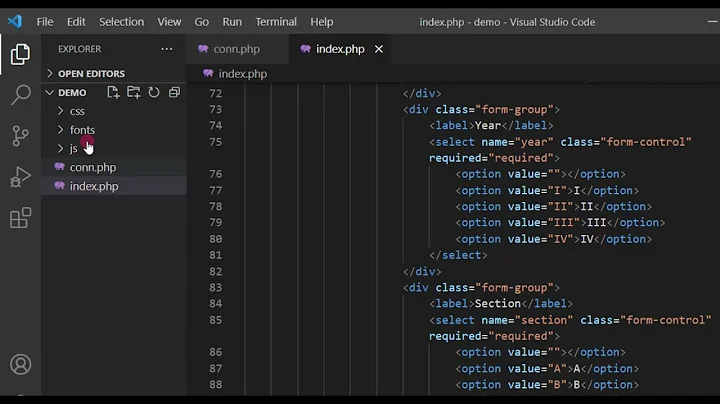
Php Script To Export Data from Mysql Table to Excel File
Here we have created simple script to export data from mysql table to excel file-
Php Script To Export Data from Mysql Table to Excel File & Download:
<?php
header("Content-type: application/vnd-ms-excel");
$fileName = "testUsers";
header("Content-Disposition: attachment; filename=".$fileName.".xls");
?>
<table border="1">
    <tr>
    	<th>NO.</th>
		<th>NAME</th>
		<th>EMAIL</th>
		<th>PHONE</th>
	</tr>
	<?php
	//Mysql connection
	mysql_connect("localhost", "root", "");
	mysql_select_db("myDb");

	//query get data
	$sql = mysql_query("SELECT * FROM test_user ORDER BY id ASC Limit 0, 7");
	$no = 1;
	while($data = mysql_fetch_assoc($sql)){
		echo '
		<tr>
			<td>'.$no.'</td>
			<td>'.$data.'</td>
			<td>'.$data.'</td>
			<td>'.$data.'</td>
		</tr>
		';
		$no++;
	}
	?>
</table>
|
Try it & Download »
Headers header(“Content-type: application/vnd-ms-excel”); & header(“Content-Disposition: attachment; filename=”.$fileName.”.xls”); are used to download convert the plain data in excel format and save it.
You can try and download the full code from the above link provided along with the try it button.
Advertisements
Windows XP
Итак, перед нами поставлена задача сделать автоматизированный отчет на основании данных сервера SQL . Есть несколько способов решения данной задачи: вы можете использовать Microsoft Office Access, но мы п ойдем простым путем и сделаем этот отчет в Microsoft Office Excel
ВНИМАНИЕ: для создания данного отчета Вам необходимо проверить настройки (Источники данных (ODBC) в панели управления. В разделе системный DNS добавьте коннектор, который будет смотреть на Ваш сервер SQL
Также проверьте, что для Вашей учетной записи доступны те вьюхи и те таблицы которые вам нужны для отчета. После настройки ODBC мы открываем Microsoft Office Excel.

![Автоматизация обработки таблиц в excel [разбор кейса] | блог о продуктивности в excel](https://wudgleyd.ru/wp-content/uploads/1/8/b/18b51b311a03215a40fdaa0d8ae6e970.jpeg)

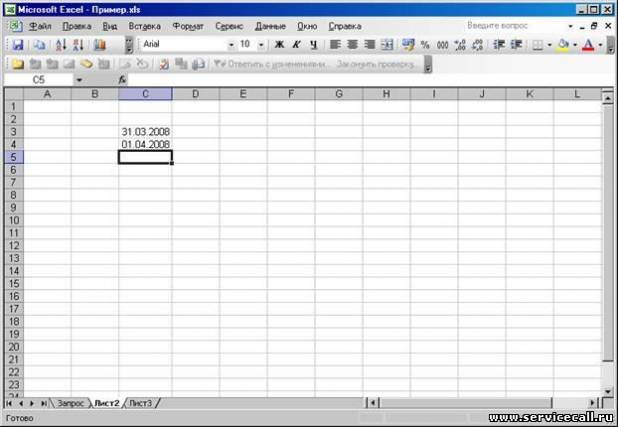
На листе 2 пишем период отчета.
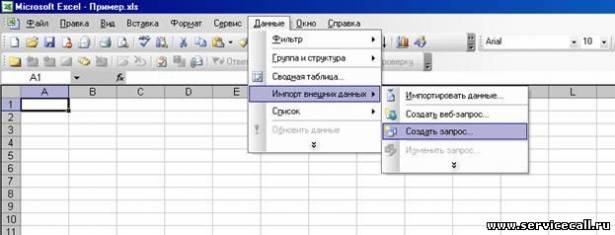
Переходим на страницу куда будут выгружаться данные. Я переименовал страницу «Лист1» в «Запрос». Теперь необходимо сделать связку на наш SQL сервер «Действие >Импорт внешних данных > Создать запрос»
В данном окне Вам необходимо вбить логин и пароль на доступ к SQL серверу. Который Вам должен предоставить администратор SQL сервера.

В водим пароль и логин.
Далее вываливается список доступных таблиц и вьюх по данному логину.
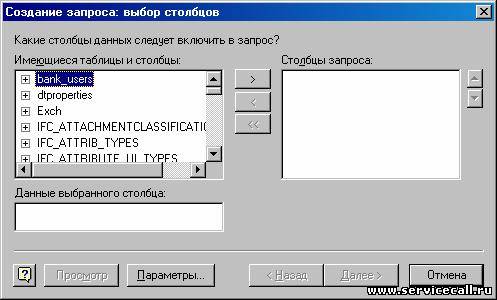
Жмем отмена.
В диалоговом окне « Microsoft Query »
Возврат к списку
Форум для отзывов 21 не существует.
Вставка данных в таблицу базы данных MySQL
После создания таблицы, следующим шагом будет ввод данных в таблицу. Чтобы ввести данные в таблицу, мы должны соблюдать определенные правила:
- Если значение, которое нужно вставить, является строкой, мы должны заключить ее в кавычки.
- Числовое значение нельзя заключать в кавычки.
- нельзя заключать в кавычки.
- Если столбец в таблице имеет параметр , то нам не нужно вставлять данные в этот столбец, т.к. данные будут вставляются автоматически.
Для вставки новых строк в таблицу базы данных используется оператор .
INSERT INTO table_name (column1, column2, column3,…)
VALUES (value1, value2, value3,…)
Давайте сделаем SQL-запрос, используя оператор с соответствующими значениями, после чего мы передадим его функции PHP для вставки данных в таблицу.
Пример
Скопировать
Примечание: Если столбец — это AUTO_INCREMENT (например, столбец «id»), то его не нужно указывать в запросе SQL. Этот модификатор сообщает MySQL автоматически присвоить значение этому полю.
Создание, выгрузка XLS файла
Алгоритм действий следующий. После создания и работы с таблицей, используется фабрика объектов выгрузки:
$objWriter = PHPExcel_IOFactory::createWriter($objPHPExcel, ‘Excel5’);
| 1 | $objWriter=PHPExcel_IOFactorycreateWriter($objPHPExcel,’Excel5′); |
где определяется формат файла.
В качестве пункта назначения можно указать файл или консоль, если выгрузить требуется сразу пользователю в браузер.
<?php
//здесь мы создаём таблицу $objPHPExcel и наполняем её данными
//или правим существующий файл
…
//выводим файл для скачки пользователем
//формируем заголовки
header(‘Content-Type: application/vnd.ms-excel’);
header(‘Content-Disposition: attachment;filename=»myfile.xls»‘);
header(‘Cache-Control: max-age=0’);
//инициализируем объект через ферму для записи,
//к примеру, в формате Excel5
$objWriter = PHPExcel_IOFactory::createWriter($objPHPExcel, ‘Excel5’);
//выводим XLS
$objWriter->save(‘php://output’);
?>
|
1 |
<?php … header(‘Content-Type: application/vnd.ms-excel’); header(‘Content-Disposition: attachment;filename=»myfile.xls»‘); header(‘Cache-Control: max-age=0’); //инициализируем объект через ферму для записи, $objWriter=PHPExcel_IOFactory::createWriter($objPHPExcel,’Excel5′); //выводим XLS $objWriter->save(‘php://output’); ?> |
Exporting from an SQL database
If your goal is to allow data to be exported from a query result
then the changes are relatively simple:
This is the entire script required to query the database, clean the
data, and trigger a file download.
The database functions need to match the database you’re using.
MySQL users for example will need to use mysqli_query
and either mysqli_fetch_assoc or mysqli_fetch_assoc in place of the PostgreSQL
functions. Or better, PDO::query().
For other databases see under
below or check the PHP documentation.
If you are seeing duplicate
columns (numbered as well as labeled) you need to change the fetch call
to return only the associative (ASSOC) array.
If you’re having trouble at this stage, remove the
Content-Disposition header and change the Content-Type back to
text/plain. This makes debugging a lot easier as you can see
the output in your browser rather than having to download and open the
generated file every time you edit the script.
Регистрация и Авторизация на PHP + MySQL
Доброго времени суток друзья! Давай с Вами рассмотрим регистрацию пользователей на PHP. Для начала давайте определим условия для нашей регистрации пользователей:
Условия для регистрации пользователей
- Пароль шифруем при помощи алгоритма MD5
- Пароль будем «солить»
- Проверка на занятость Логина
- Активация пользователя письмом.
- Запись и хранение данных в СУБД MySQL
Для написание данного скрипта нам нужно понять, что такое регистрация пользователя. Регистрация пользователя – это получения данных реального пользователя, обработка и хранение данных.
Если объяснять простыми словами то регистрация это всего лишь запись и хранение определенных данных по которым мы можем авторизировать пользователя в нашем случае – это Логин и Пароль.
Авторизация — предоставление определённому лицу или группе лиц прав на выполнение определённых действий, а также процесс проверки данных прав при попытке выполнения этих действий. Проше говоря с помощью авторизации мы можем разграничить доступ к тому или иному контенту на нашем сайте.
Рассмотрим структуру каталогов скриптов для реализации нашей регистрации с авторизацией. Нам нужно разбить скрипты на логические составляющие. Модули регистрации и авторизации мы поместив в отдельный каталог. Так же в отдельные каталоги мы поместим подключение к базе данных MySQL, файл с пользовательскими функциями, файл стилей CSS и наш шаблон HTML.
Данная структура позволяет быстро ориентироваться в скриптах. Представьте себе, что у Вас большой сайт с кучей модулями и т.д. и если не будет порядка, то будет очень сложно что-то отыскать в таком бардаке.
Так как мы будем хранить все данные в СУБД MySQL, то давайте создадим не большую таблицу в которой будем хранить данные о регистрации.
Для начала нужно создать таблицу в базе данных. Таблицу назовем bez_reg где bez – это префикс таблицы, а reg название таблицы.
Export/Import MySQL data to Excel using the From Database feature
Similar to the method in the section above, Excel provides one more option to load data from the MySQL database to Excel.
In the Data tab, under the Get Data list, choose the From MySQL Database command:
In the MySQL database dialog, enter server and database name from which you want to load data and click the OK button:
On the next window, under the Database tab, enter credentials for the user that have permission to access the targeted database and click the Connect button:
From the Navigator window, choose the tables, views, etc. from which to load data:
Click the Transform Data button. The Power Query Editor window will appear with desired data in it. Now, the steps for loading data are the same as we explained in the previous section:


Загрузка XLS файла
В составе библиотеки находятся классы для работы со всеми из перечисленных типов, но наиболее популярен универсальный подход инициализации объекта через фабрику, которая сама определяет формат данных и создаёт объект нужного типа.
$inputFileName = ‘./sampleData/example1.xls’;
/** Load $inputFileName to a PHPExcel Object **/
$objPHPExcel = PHPExcel_IOFactory::load($inputFileName);
|
1 |
$inputFileName = ‘./sampleData/example1.xls’; /** Load $inputFileName to a PHPExcel Object **/ $objPHPExcel = PHPExcel_IOFactoryload($inputFileName); |
Дальше вы можете обратиться к определенной странице документа, нужной ячейке.
//выбрать первую страницу, показать значение ячейки ‘D5’
$objPHPExcel->getSheet(0);
$AC = $objPHPExcel->getActiveSheet();
echo $AC->getCell(‘D5’)->getValue();
|
1 |
//выбрать первую страницу, показать значение ячейки ‘D5’ $objPHPExcel->getSheet(); $AC=$objPHPExcel->getActiveSheet(); echo$AC->getCell(‘D5’)->getValue(); |
Вставка данных в БД из HTML-формы
В предыдущем разделе мы узнали, как вставлять данные в базу данных из сценария PHP. Теперь посмотрим, как мы можем вставить данные в базу данных, полученную из HTML-формы. Давайте создадим HTML-форму, которую можно использовать для вставки новых записей в таблицу persons.
Создадим простую HTML-форма с тремя текстовыми <input> полями и кнопкой отправки:
Пример
Скопировать
Получение и вставка данных формы
Когда пользователь нажимает кнопку отправки HTML-формы, в приведенном выше примере данные формы отправляются в файл-обработчик PHP ‘insert.php’. Файл ‘insert.php’ подключается к серверу базы данных MySQL, извлекает поля форм с использованием переменной PHP и, наконец, выполняет запрос на вставку записей в БД.
Ниже приведен полный код нашего файла insert.php:
Пример
Скопировать
Примечание: Функция экранирует специальные символы в строке и создает допустимую строку SQL для защиты от атаки, при которой злоумышленник может внедрить или выполнить вредоносный код SQL.
Это простой пример вставки данных формы в таблицу базы данных MySQL. Вы можете расширить этот пример и сделать его более интерактивным, добавив проверки для пользовательского ввода перед вставкой его в таблицы базы данных. Ознакомьтесь с руководством по проверке форм PHP, чтобы узнать больше о валидации и проверке вводимых пользователем данных с помощью PHP.
Назад
Вперёд
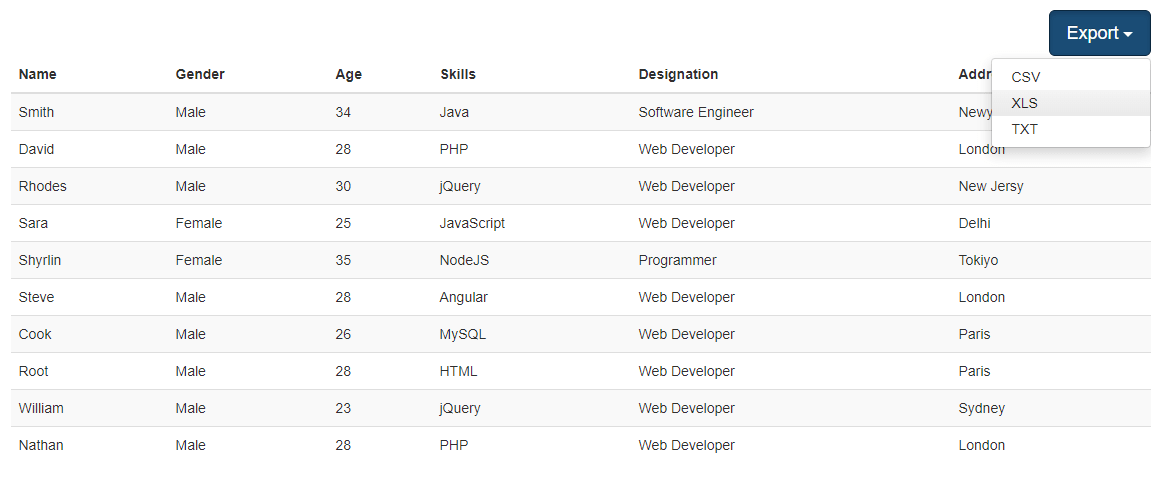
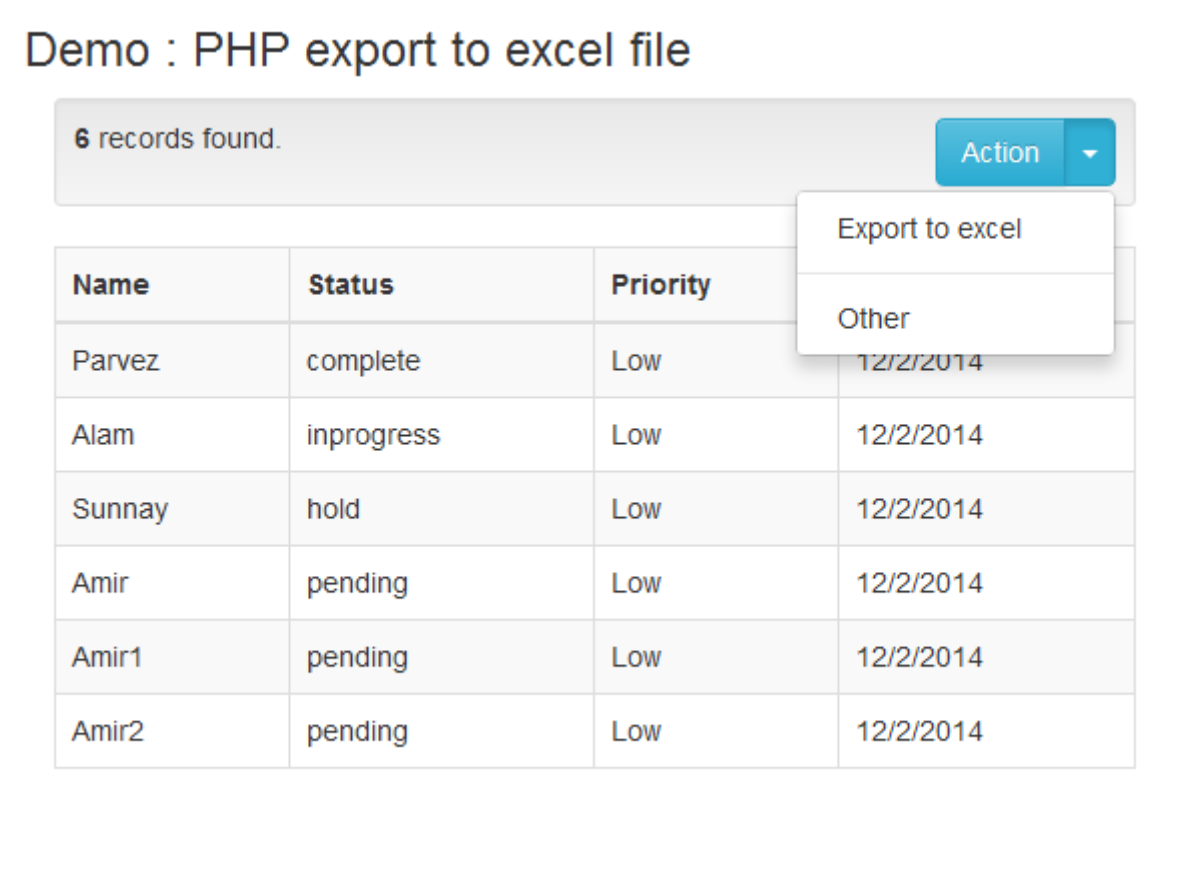
Export to Excel using a third-party software
Using the Export to Excel feature from ApexSQL Database Power Tools for VS Code, query results can be exported to MySQL data from the results grid in just a few steps. Besides exporting data to Excel, this VS Code extension provides a couple of more exporting options, such as export data to JSON, CSV, and HTML file format.
In a query editor of the VS Code extension, execute a query from which you want to be data exported. In the top right corner of the Results grid, click the Export to Excel button:
In the Save as window, enter a name and location for a new Excel file and click the Save button:
The exported data will look like this:
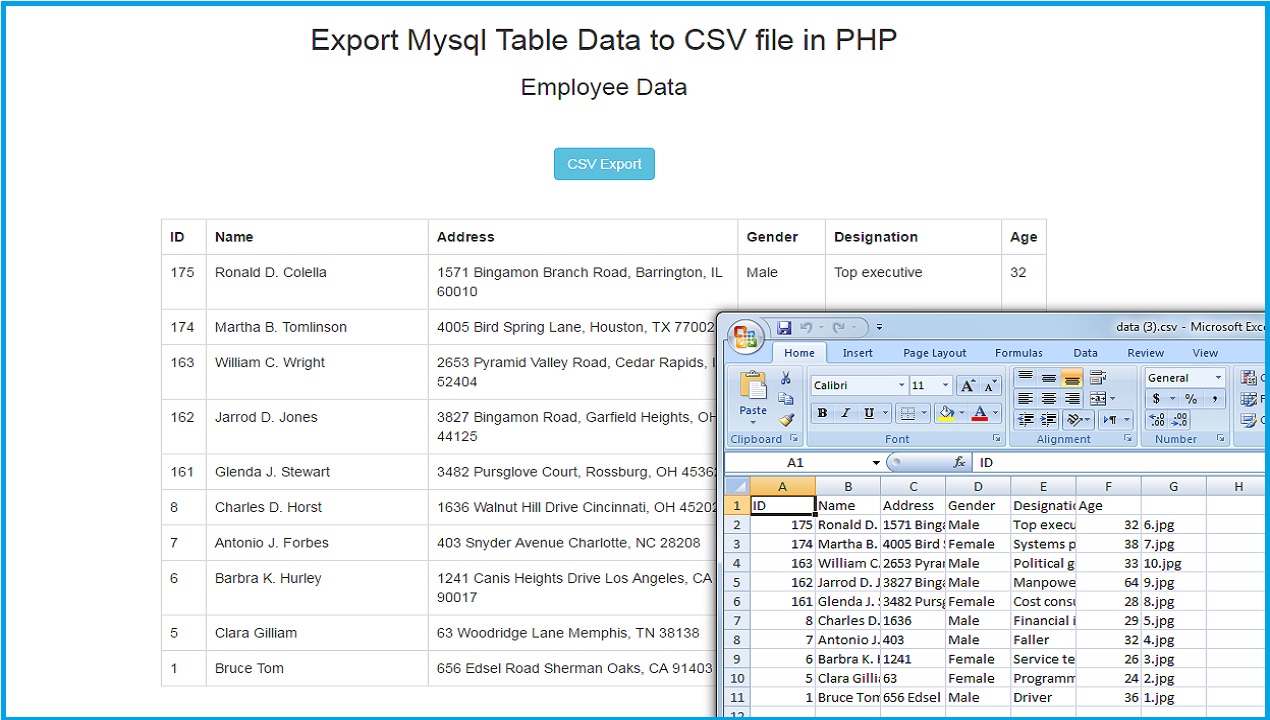
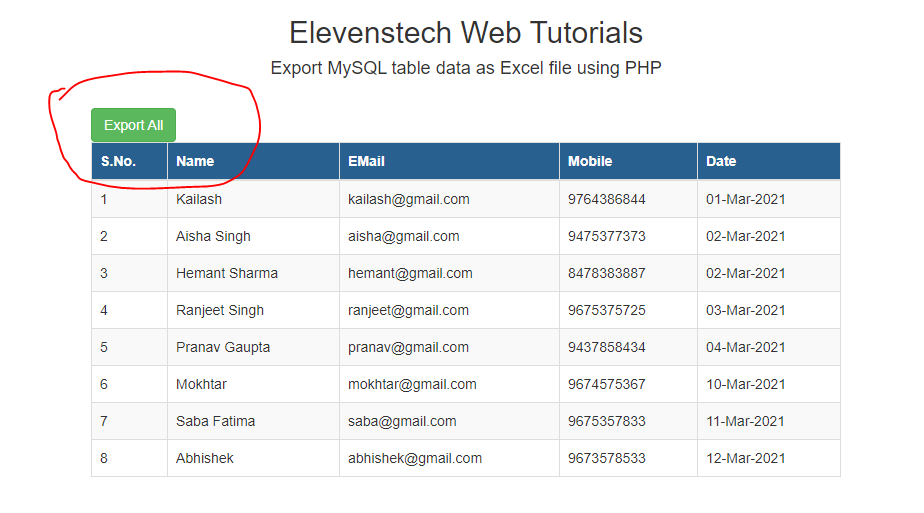
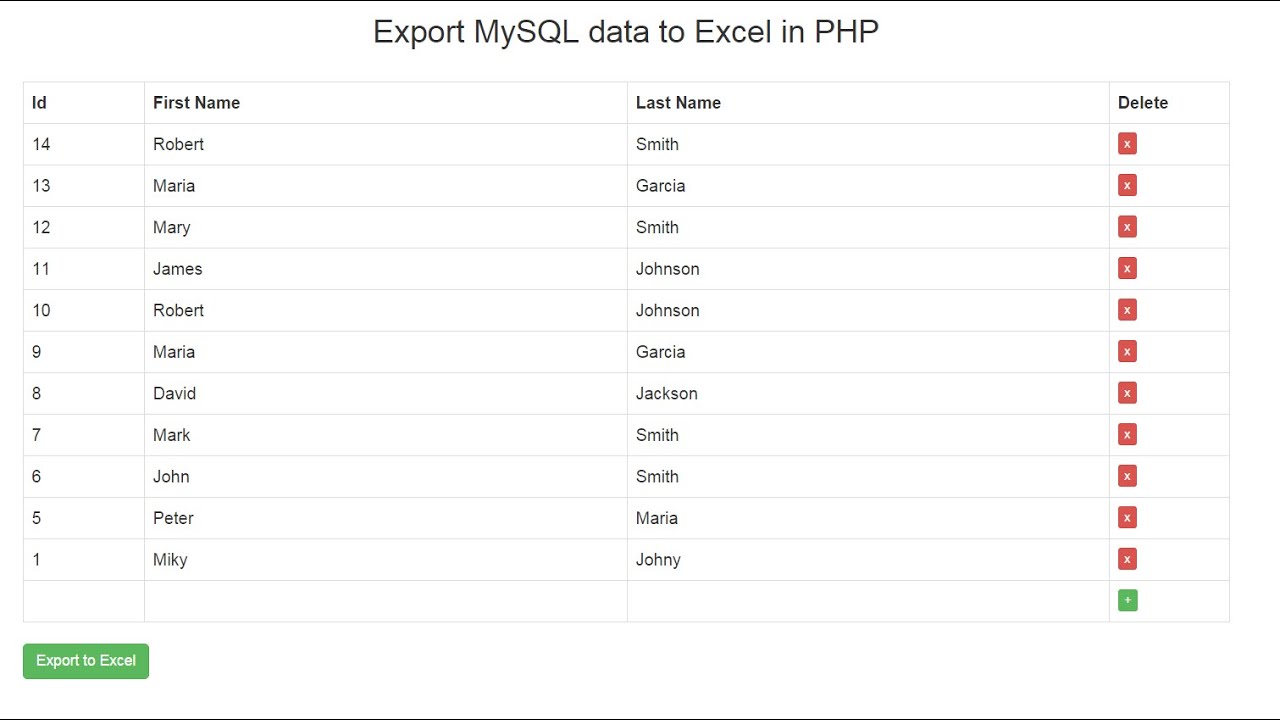
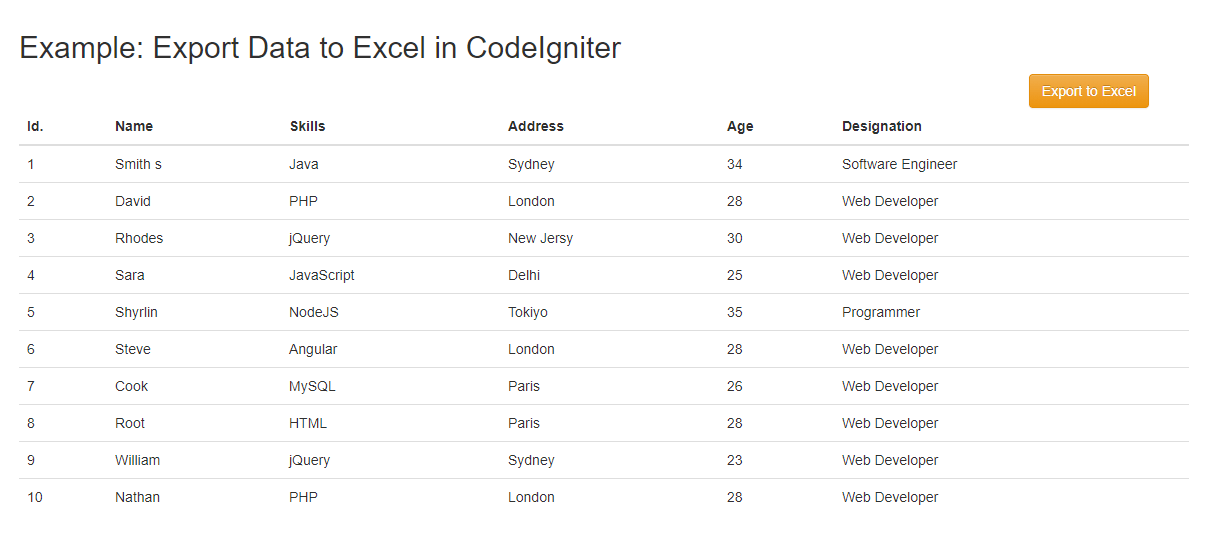
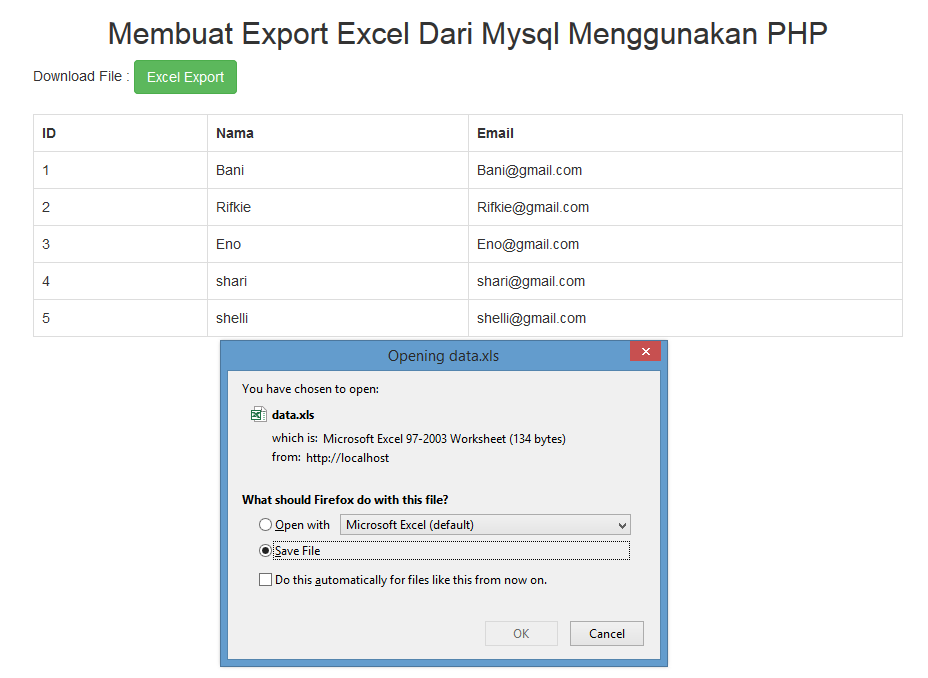
Export Data from Database to Excel with PHP and MySQL
In this example script, we will export data from the MySQL database in an excel file using PHP.
Create Database Table:
For this example, we will create a table with some basic fields in the MySQL database. The table holds the records which will be exported to excel.
CREATE TABLE `members` (
  `id` int(11) NOT NULL AUTO_INCREMENT,
  `first_name` varchar(25) COLLATE utf8_unicode_ci NOT NULL,
  `last_name` varchar(25) COLLATE utf8_unicode_ci NOT NULL,
  `email` varchar(50) COLLATE utf8_unicode_ci NOT NULL,
  `gender` enum('Male','Female') COLLATE utf8_unicode_ci NOT NULL,
  `country` varchar(20) COLLATE utf8_unicode_ci NOT NULL,
  `created` datetime NOT NULL,
  `status` tinyint(1) NOT NULL DEFAULT 1 COMMENT '1=Active | 0=Inactive',
  PRIMARY KEY (`id`)
) ENGINE=InnoDB DEFAULT CHARSET=utf8 COLLATE=utf8_unicode_ci;
Database Configuration (dbConfig.php):
The following code is used to connect the database using PHP and MySQL. Specify the database host (), username (), password (), and name () as per your database credentials.
<?php // Database configuration $dbHost = "localhost"; $dbUsername = "root"; $dbPassword = "root"; $dbName = "codexworld"; // Create database connection $db = new mysqli($dbHost, $dbUsername, $dbPassword, $dbName); // Check connection if ($db->connect_error) { die("Connection failed: " . $db->connect_error); }
Export Data from Database:
The following code helps to export data from the MySQL database and download it as an excel file.
- The function is used to filter string before added to the excel data row.
- – Define the name of the excel file to be downloaded.
- – Define the column named of the excel sheet.
- – Add the first row to the excel sheet as a column name.
- Fetch member’s data from the database and add to the row of the excel sheet.
- Define headers to force the file to download.
- Render data of excel sheet.
<?php // Load the database configuration file include_once 'dbConfig.php'; // Filter the excel data function filterData(&$str){ $str = preg_replace("/\t/", "\\t", $str); $str = preg_replace("/\r?\n/", "\\n", $str); if(strstr($str, '"')) $str = '"' . str_replace('"', '""', $str) . '"'; } // Excel file name for download $fileName = "members-data_" . date('Y-m-d') . ".xls"; // Column names $fields = array('ID', 'FIRST NAME', 'LAST NAME', 'EMAIL', 'GENDER', 'COUNTRY', 'CREATED', 'STATUS'); // Display column names as first row $excelData = implode("\t", array_values($fields)) . "\n"; // Fetch records from database $query = $db->query("SELECT * FROM members ORDER BY id ASC"); if($query->num_rows > ){ // Output each row of the data while($row = $query->fetch_assoc()){ $status = ($row'status'] == 1)?'Active''Inactive'; $lineData = array($row'id'], $row'first_name'], $row'last_name'], $row'email'], $row'gender'], $row'country'], $row'created'], $status); array_walk($lineData, 'filterData'); $excelData .= implode("\t", array_values($lineData)) . "\n"; } }else{ $excelData .= 'No records found...'. "\n"; } // Headers for download header("Content-Type: application/vnd.ms-excel"); header("Content-Disposition: attachment; filename=\"$fileName\""); // Render excel data echo $excelData; exit;
Получение файлов, необходимых для подключения к Excel
Прежде чем импортировать или экспортировать данные в Excel с использованием SSIS, вам может потребоваться скачать компоненты подключения для Excel, если они еще не установлены. По умолчанию компоненты подключений для Excel не устанавливаются.
Скачать последнюю версию компонентов подключения для Excel можно на следующей странице: Распространяемый пакет ядра СУБД Microsoft Access 2016. Последняя версия компонентов позволяет открывать файлы, созданные в более ранних версиях Excel.
Примечания по загрузке и установке
Обратите внимание, что необходимо скачать распространяемый пакет ядра СУБД Access 2016, а не среду выполнения Microsoft Access 2016.
Если на компьютере уже установлена 32-разрядная версия Office, необходимо установить 32-разрядную версию компонентов. Кроме того, следует выполнять пакет служб SSIS в 32-разрядном режиме или 32-разрядную версию мастера импорта и экспорта.
Если у вас есть подписка на Microsoft 365, при запуске программы установки может появиться сообщение об ошибке
Это сообщение свидетельствует о том, что невозможно установить скачанные компоненты вместе с компонентами Office, полученными с помощью технологии “нажми и работай”. Чтобы обойти это сообщение, запустите установку в тихом режиме. Для этого откройте окно командной строки и запустите скачанный EXE-файл с параметром /quiet. Пример:
C:UsersDownloadsAccessDatabaseEngine.exe /quiet
При возникновении проблем с установкой распространяемого пакета версии 2016 установите вместо него распространяемый пакет версии 2010 со следующей страницы: Распространяемый пакет ядра СУБД Microsoft Access 2010. (Для Excel 2013 распространяемый пакет не предусмотрен.)
Как экспортировать данные из PHP в Excel файл?
Библиотека PHPExcel, скачать её можно с http://phpexcel.codeplex.com. Ниже пример генерации Excel-файла через PHP-скрипт.
Код PHP
<?php require_once ‘phpexcel/PHPExcel.php’; // Подключаем библиотеку PHPExcel $phpexcel = new PHPExcel(); // Создаём объект PHPExcel /* Каждый раз делаем активной 1-ю страницу и получаем её, потом записываем в неё данные */ $page = $phpexcel->setActiveSheetIndex(0); // Делаем активной первую страницу и получаем её $page->setCellValue(«A1», «Hello»); // Добавляем в ячейку A1 слово «Hello» $page->setCellValue(«A2», «World!»); // Добавляем в ячейку A2 слово «World!» $page->setCellValue(«B1», «tradebenefit.ru»); // Добавляем в ячейку B1 слово «tradebenefit.ru» $page->setCellValue(«B2», «MyFirstPage»); // А в ячейку B2 слова «MyFirstPage» $page->setTitle(«Example»); // Заголовок делаем «Example» /* Начинаем готовиться к записи информации в xlsx-файл */ $objWriter = PHPExcel_IOFactory::createWriter($phpexcel, ‘Excel2007’); /* Записываем в файл */ $objWriter->save(«example.xlsx»); ?> По результатам работы скрипта в той же директории, что и php-файл, появится наш example.xlsx . Файл с данным расширением соответственно можно открыть в Excel 2007 и поздних версиях.
Библиотека даёт большой спектр возможностей, о которых уже можно узнать из документации.
Расширенный пример с сайта: пример кода PHP
Спасибо за внимание! Стараемся шагать в ногу со временем!)
Export/Import MySQL data to Excel using the SELECT INTO … OUTFILE statement
One of the commonly used MySQL statement which can be included in the SELECT statements for exporting data to specific (e.g., .txt, .CSV) file format is SELECT INTO … OUTFILE statement. This statement writes a selected row to a file. Columns and line terminators can be specified to produce a specific output format.
In a query editor, execute a SELECT statement which results want to be exported, add the location where data should be exported, and specify the file format. In the example below, the .txt file format is used:
SELECT `actor`.`actor_id`
   ,`actor`.`first_name`
   ,`actor`.`last_name`
   ,`actor`.`last_update`
 FROM `sakila`.`actor`
 INTO OUTFILE 'C:/ProgramData/MySQL/MySQL Server 8.0/Uploads/actor.txt' FIELDS TERMINATED BY ',' ENCLOSED BY '"' LINES TERMINATED BY '\r\n'
When the above statement is executed, all exported data will be in the actor.txt file:
Under the specified location:
For more details about SELECT INTO … OUTFILE statement, see How to export MySQL data to CSV article.
When the data is exported, let’s open it in Excel and save it in .xlsx file format.

![Автоматизация обработки таблиц в excel и перенос данных в mysql [ разбор кейса ]](https://wudgleyd.ru/wp-content/uploads/7/8/7/787d190ecae962f612e0a90ee7182130.png)

Open Excel and under the Data tab, click the From Text/CSV button:
Navigate to the location of the exported .txt file and click Import:
In the newly opened dialog, choose appropriate delimiter and click Transform Data:
In the Power Query Editor window, it is necessary to set some additional settings (e.g., add the name of the columns):
When all is set, click the Close & Load command:
The data will be loaded in a separate sheet:
Save newly imported data in .xlsx file format: