
Configure SSH Server Settings
Configure SSH Server Authentication Settings
Step 1. Log in to the switch console. The default username and password is cisco/cisco. If you have configured a new username or password, enter the credentials instead.
Note: To learn how to access an SMB switch CLI through SSH or Telnet, click here.
Note: The commands may vary depending on the exact model of your switch. In this example, the SG350X switch is accessed through Telnet.
Step 2. From the Privileged EXEC mode of the switch, enter the Global Configuration mode by entering the following:
SG350X#configure
Step 3. To enable remote SSH server authentication by the SSH client, enter the following:
SG350X(config)#ip ssh-client server authentication

Step 4. To specify the source interface which IPv4 address will be used as the Source IPv4 address for communication with IPv4 SSH servers, enter the following:
SG350X(config)#ip ssh-client source-interface
interface-id — Specifies the source interface.

Note: In this example, the source interface is VLAN 20.
Step 5. (Optional) To specify the source interface whose IPv6 address will be used as the Source IPv6 address for communication with IPv6 SSH servers, enter the following:
SG350X(config)#ipv6 ssh-client source-interface
interface-id — Specifies the source interface.
Note: In this example, source IPv6 address is not configured.
Step 6. To add a trusted server to the Trusted Remote SSH Server Table, enter the following:
SG350X(config)#ip ssh-client server fingerprint
The parameters are:
- host — Domain Name Server (DNS) name of an SSH server.
- ip-address — Specifies the address of an SSH server. The IP address can be an IPv4, IPv6 or IPv6z address.
- fingerprint — Fingerprint of the SSH server public key (32 Hex characters).

Note: In this example, the server IP address is 192.168.100.1 and the fingerprint used is 76:0d:a0:12:7f:30:09:d3:18:04:df:77:c8:8e:51:a8.
Step 7. Enter the exit command to go back to the Privileged EXEC mode:
SG350X(config)#exit

Step 8. To display the SSH server authentication settings on the switch, enter the following:
SG350X#show ip ssh-client server
The parameters are:
- host — Domain Name Server (DNS) name of an SSH server.
- ip-address — Specifies the address of an SSH server. The IP address can be an IPv4, IPv6 or IPv6z address.

Note: In this example, the server IP address 192.168.100.1 is entered.
Step 9. (Optional) In the Privileged EXEC mode of the switch, save the configured settings to the startup configuration file by entering the following:
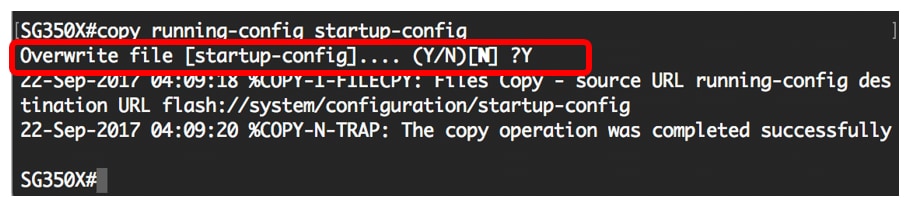
SG350X#copy running-config startup-config

Step 10. (Optional) Press Y for Yes or N for No on your keyboard once the Overwrite file …. prompt appears.
You have now learned the steps to configure server authentication on a managed switch through the CLI.
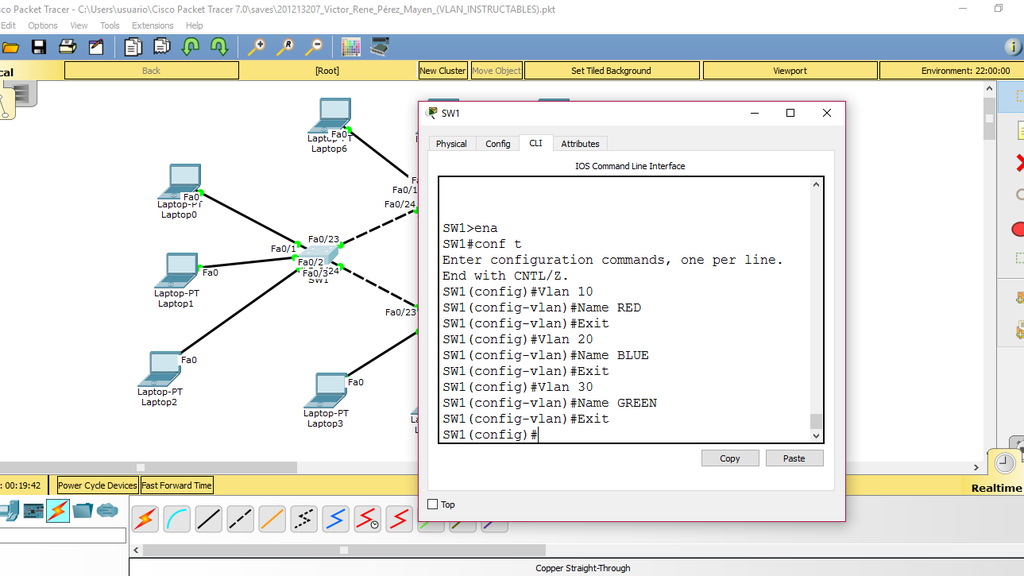
Пароли
Подключение по telnet или ssh называется виртуальным терминалом (vt) и настраивается следующим образом:
0 4 — это 5 пользовательских виртуальных терминалов=telnet сессий. Этого уже достаточно, чтобы попасть в пользовательский режим, но недостаточно для привилегированного:
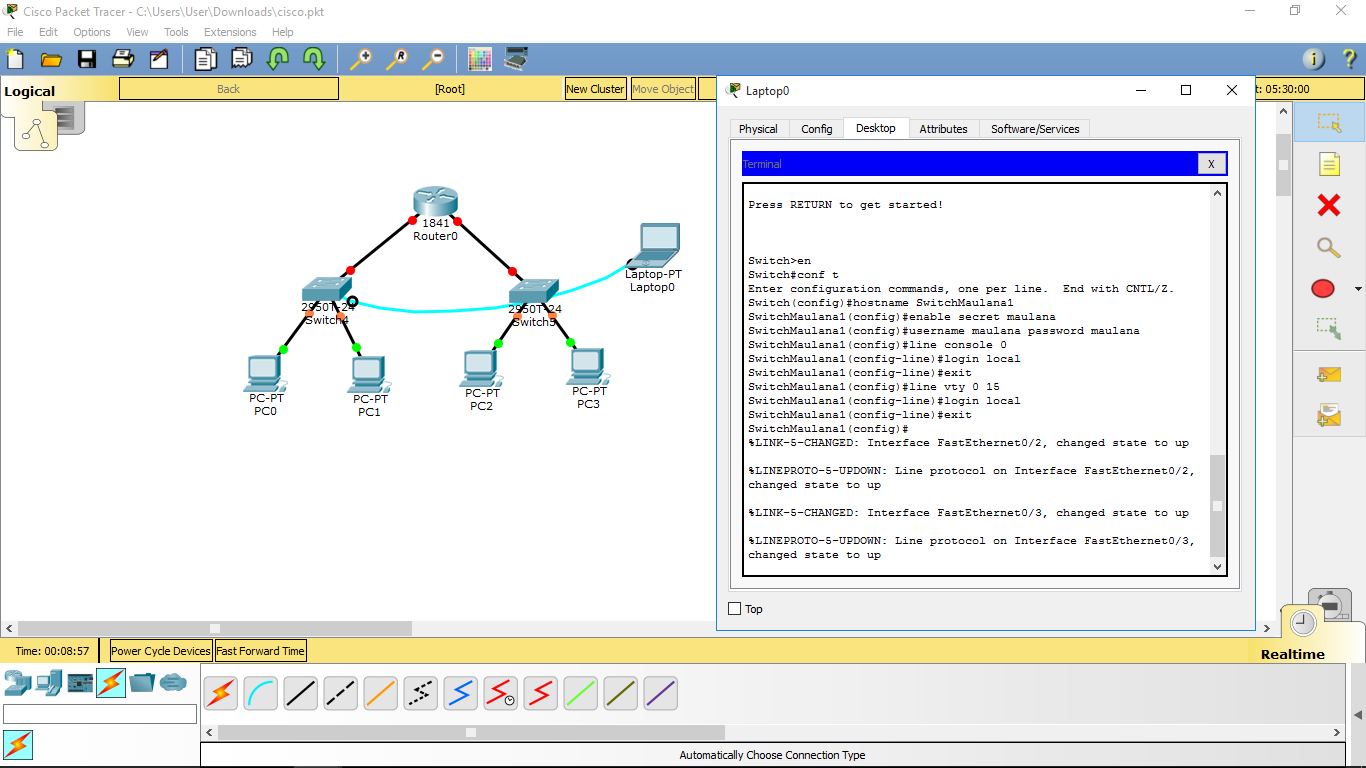
 Вход в пользовательский режим
Настроим пароль для enable-режима:
 Вход в привилегированный режим
Чем отличается secret от password? Примерно тем же, чем ssh от telnet. При настройке secret пароль хранится в зашифрованном виде в конфигурационном файле, а password – в открытом. Поэтому рекомендуется использование secret.
Если вы всё-таки задаёте пароль командой , то следует применить так же , тогда ваш пароль в конфигурационном файле будет зашифрован:
Один мой знакомый рассказал мне историю:
Стоял он как-то курил возле одного из своих узлов, находящемся в жилом доме. С сумкой для инструментов, ноутбук в руках. Вдруг подходит двое алкашей с пакетом и предлагают купить, раскрывая пакет и показывая какой-то свич. Просят 500 рублей. Ну он купил. По меткам и модели свича парень сделал вывод какому провайдеру он принадлежит. Пришёл домой, начал ковырять — телнет закрыт, консоль запаролена. Слил конфиг по snmp. Пароли в открытом виде хранятся, имя с головой выдаёт провайдера. С их админом он знаком лично, позвонил ему вместо “Здрасьти” выдал логин и пароль в трубку. Слышно было, как скрипел мозг первые секунд 20: везде аксес-листы, авторизация, привязка к мак-адресу. Как?! В общем, всё хорошо, что хорошо кончается.
Хотим обратить ваше внимание: сейчас принятно настраивать доступы не через виртуальные терминалы, а командами и. В версии PT 5.3.2 они уже есть и вполне работают
Для этого нужно выполнить:
Первая команда служит для активации новой модели ААА (Authentication, Authorization, Accounting). Это нужно для того, чтобы была возможность использовать для аунтетификации на устройстве RADIUS или TACACS сервер. Если отдельно это не настроено, то будет использоваться локальная база пользователей, задаваемая командой .
Будьте внимательны: приоритет команды выше, чем команд виртуальных терминалов и поэтому даже несмотря на то, что у вас настроен password в режиме line vty, если у вас не будет пользователей в локальной базе, зайти на устройство удалённо уже не получится.
Теперь при подключении маршрутизатор запросит имя пользователя и соответствующий ему пароль.
При более глубокой настройке line vty существует одна опасность.
Есть такой параметр: . Его настройка позволяет ограничить IP-адреса, с которых возможно подключение. И вот однажды я, как умная маша, решил заняться безопасностью в сети и на всём почти оборудование понаставил эти аксес-листы, чтобы комар не пролетел. В один прекрасный момент пришлось выехать в поле и в тот день я проклял свою аккуратность – никуда не мог достучаться – малейшей лазейки не оставил. В общем будьте с этой командой внимательны или оставляйте для себя лазейки.
При работе с access-list’ами и прочими опасными вещами, неправильная настройка которых может лишить вас доступа к устройству, можно использовать замечательную команду , где min время в минутах. Эта команда перезагрузит устройство по истечении указанного времени, если ее не прервать командой . Т.е. схема работы такова: вы удаленно копаете что-то, что может в теории (закон Мерфи не забываем) прервать ваш сеанс связи с устройством. Сохраняем текущий (рабочий) конфиг в (он используется при загрузке), ставим , вводим ключевую команду, относительно которой у нас сомнения ;-), и получаем обрыв связи, худшие опасения оправдались. Ждем 15 минут, устройство перегружается с рабочим конфигом, коннект — вуаля, связь есть. Либо (если связь не прервалась) проверяем, что все работает, и делаем .
Если вы хотите ограничить паролем доступ через консольный порт, вам понадобятся команды
Prerequisites for configuring SSH
In order to enable SSH on a Cisco router or switch you must verify first if the IOS image on the device supports it. The easiest way to find out if your IOS images supports SSH is to run the show version command in user exec mode and look at the image name. Find the line that starts with System image file is:. If the image contains k9 in its name then you can use cryptographic features, otherwise you need to upgrade the IOS version.
After you have confirmed your IOS image supports SSH, verify if it’s not already enabled. From user or privileged exec mode run the following command:
Router#show ip ssh
SSH Disabled – version 1.99
%Please create RSA keys (of at least 768 bits size) to enable SSH v2.
![Как включить ssh сервер на коммутаторе cisco catalyst с ios v.15 [вики it-kb]](https://wudgleyd.ru/wp-content/uploads/5/b/c/5bc91015c245a720146369f820deb70b.png)
![Security configuration guide, cisco ios xe fuji 16.9.x (catalyst 9200 switches) - configuring secure
shell (ssh) [support] - cisco](https://wudgleyd.ru/wp-content/uploads/d/a/0/da052f88cad2b26562b6997f072fa7dd.jpeg)
![Catalyst 2960-x switch security configuration guide, cisco ios release 15.0(2)ex - configuring secure
shell (ssh) [cisco catalyst 2960-x series switches] - cisco](https://wudgleyd.ru/wp-content/uploads/9/8/d/98d76dcf9cb5bd9d1056343af0aeea9b.png)

The output of this command shows that SSH is supported but it’s disabled. The next step is to configure the hostname and the domain name. Enter global configuration mode and run the following sequence of commands, replacing the hostname (R1) and the domain name (cioby.ro) with your own names:
Router1#configure terminal
Router(config)# hostname R1
R1(config)# ip domain-name cioby.ro
After the hostname and domain name have been configured you must generate an RSA key pair for your device. Type the following command in global configuration mode:
R1(config)# crypto key generate rsa
After typing this command you will be asked the length of the key. The key length accepted by the router or switch is between 360 and 2048 bits. Larger keys provide greater security, but affect performance. Using keys shorter than 1024 bits is not recommended. Once the keys are created, they are stored in NVRAM and are inaccessible. The output of this command looks similar to the below:
The name for the keys will be: R1.cioby.ro
Choose the size of the key modulus in the range of 360 to 4096 for your
General Purpose Keys. Choosing a key modulus greater than 512 may take
a few minutes.
How many bits in the modulus : 2048
% Generating 2048 bit RSA keys, keys will be non-exportable…
R1(config)#
*Sep 7 11:22:03.131: %SSH-5-ENABLED: SSH 1.99 has been enabled
The above command enables the SSH server for local and remote authentication on the router. The last line shows us that SSH version 2 was enabled. To delete the RSA key-pair, use the following global configuration command:
R1(config)# crypto key zeroize rsa
After the RSA key-pair, is deleted the SSH server is automatically disabled.
In order to access a router or switch by SSH you need to configure authentication for local or remote access. This implies either using a local user database to authenticate remote users or an AAA server such as a RADIUS or TACACS+ server. To enable authentication using a local user database we must type the following sequence of commands:
R1(config)# username cisco privilege 15 secret 0 C!sc0P@ss
R1(config)# line vty 0 4
R1(config-line)# login local
Here we added a username named cisco with full privileges. The secret keyword followed by 0 tells us that the following textplain password will be encrypted in the running configuration. Here access is allowed only to the first 5 virtual terminals.
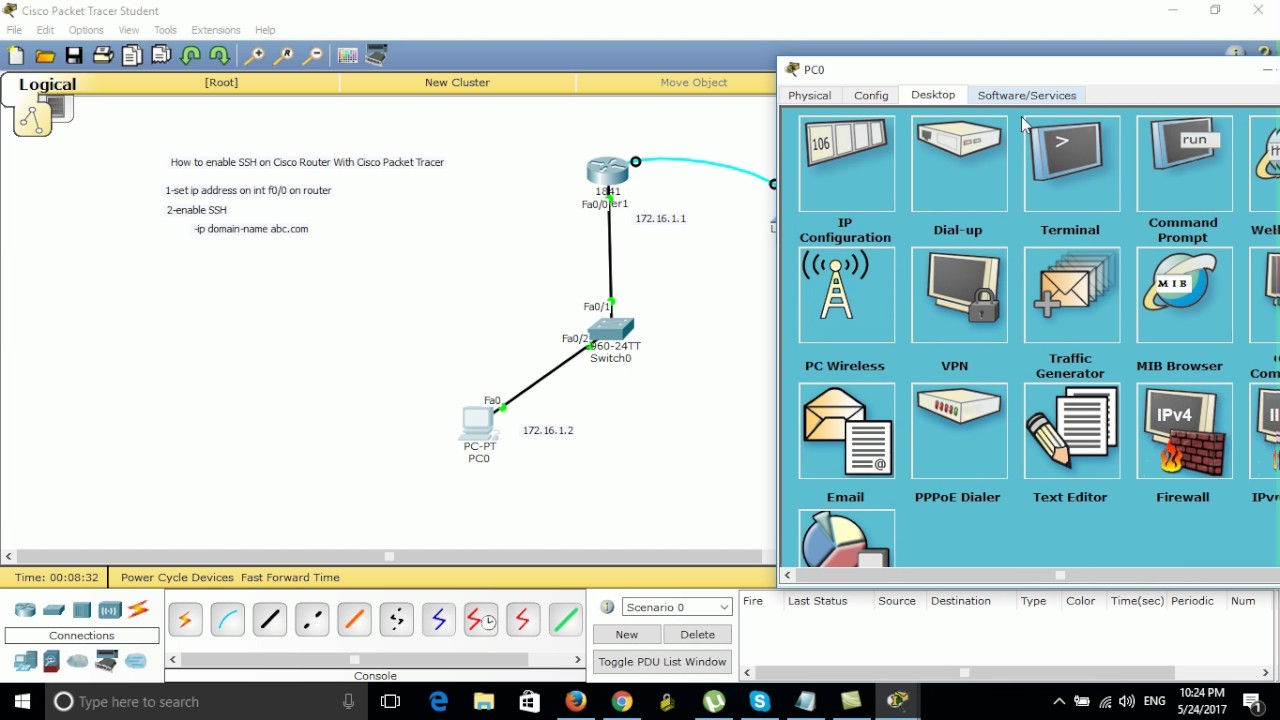
Включить Cisco SSH
Хотите узнать, как включить удаленный доступ Cisco SSH с помощью командной строки? В этом уроке мы расскажем вам все шаги, необходимые для настройки удаленного доступа SSH на коммутаторе Cisco 2960 или 3750 с использованием командной строки.
Cisco Switch Playlist:
На этой странице мы предлагаем быстрый доступ к списку видеороликов, связанных с Cisco Switch.
Playlist
Не забудьте подписаться на наш канал YouTube, названный FKIT.
Связанный учебник Cisco Switch:
На этой странице мы предлагаем быстрый доступ к списку руководств, связанных с коммутатором Cisco.
Список учебных пособий
Учебное пособие — включение удаленного доступа Cisco SSH
Во-первых, вам нужно получить доступ к консоли вашего коммутатора Cisco.
В нашем примере мы будем использовать программное обеспечение Opensource с именем Putty и компьютер под управлением Windows.
Программное обеспечение Putty доступно на веб-сайте putty.org.
По окончании загрузки запустите программное обеспечение и дождитесь следующего экрана.
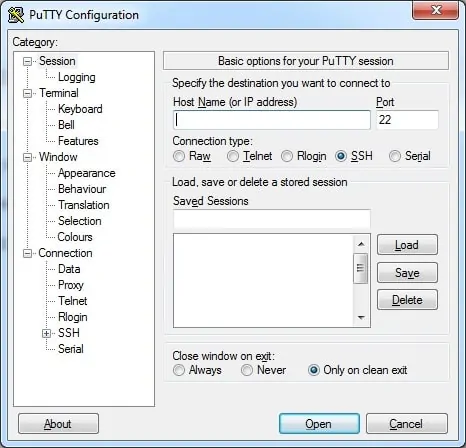
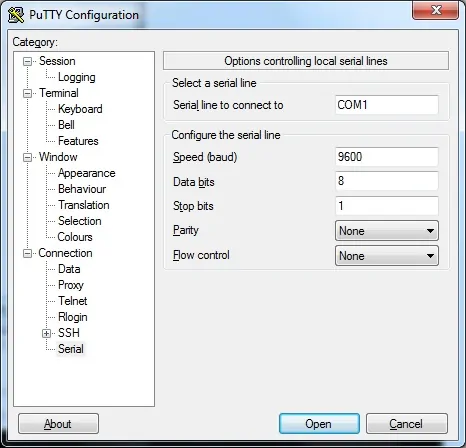
Чтобы получить доступ к консоли модели Cisco Switch 2960 или 3750, вам необходимо выбрать категорию Serial Connection и использовать следующие параметры:
• Тип подключения: последовательный
• Последовательная линия: COM1
• Скорость: 9600
Если COM1 не работает, вам нужно будет попытаться использовать COM2, COM3, COM4 или следующий.
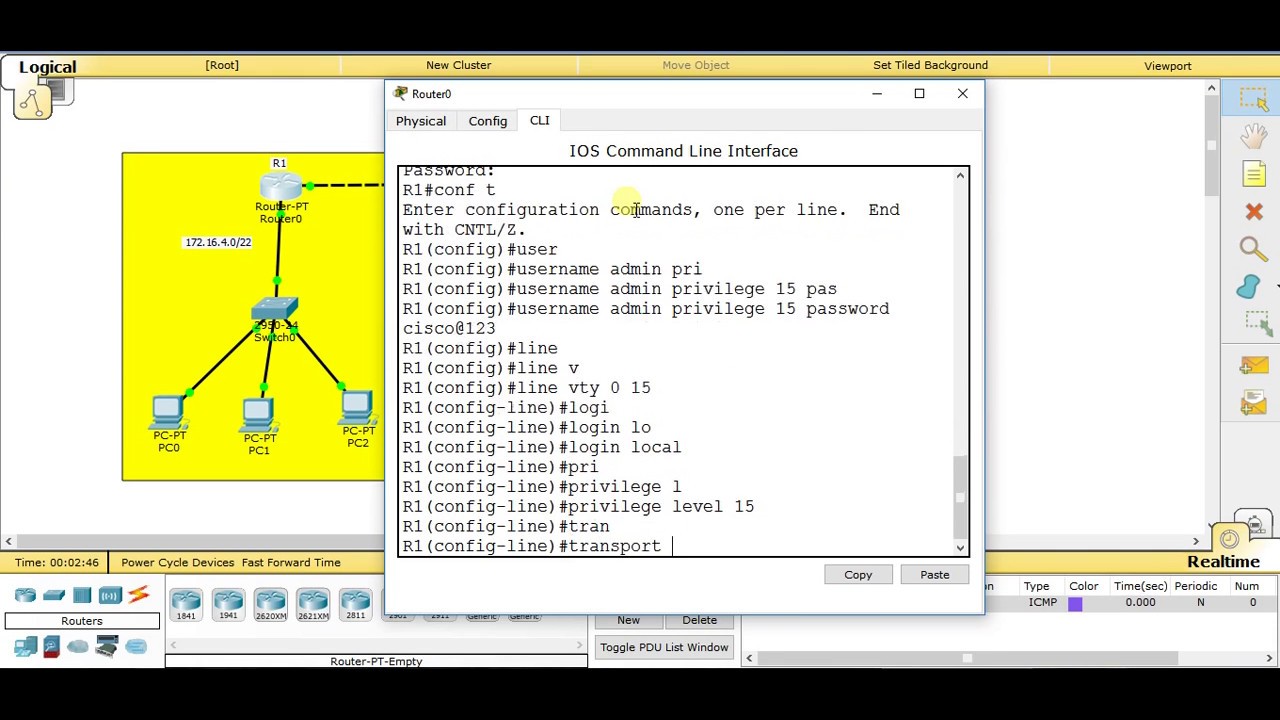
Используя консоль, telnet или ssh, подключитесь к командной строке коммутатора и войдите в систему с пользователем, имеющим административные привилегии.
На экране приглашения введите регистрационную информацию администратора.
После успешного входа в систему отобразится консольная консоль.
Switch>
Используйте команду enable для входа в режим привилегий.
Switch> enable
Используйте команду терминала конфигурации, чтобы войти в режим конфигурации.
Switch# configure terminal
Используйте следующую команду для создания необходимых ключей шифрования:
Switch(config)# crypto key generate rsa
Switch(config)# ip ssh version 2
Если система запрашивает размер ключа, вы должны сообщить самому большому номеру, доступному вашему коммутатору.
На моем коммутаторе максимальное значение: 4096
Вы также должны включить SSH версию 2, которая более безопасна и имеет множество интересных функций.
Создайте учетную запись пользователя для удаленных пользователей.
Switch(config)# username kakarot privilege 15 secret kamehameha123
Switch(config)# username yamcha privilege 1 secret lostbuma123
В нашем примере пользователь kakarot имеет права чтения и записи, а yamcha — только для чтения.
Настройте виртуальный терминал для использования локальной проверки подлинности.
Настройте виртуальные терминалы, чтобы разрешить удаленный доступ SSH.
Switch# configure terminal
Switch(config)# line vty 0 15
Switch(config-line)# login local
Switch(config-line)# transport input ssh
Switch(config-line)# exit
Switch(config)# exit
Не забудьте сохранить конфигурацию коммутатора.
Switch# copy running-config startup-config
Вы успешно включили функцию удаленного доступа Cisco SSH.
Вы успешно настроили удаленные терминалы для приема удаленных подключений.
Вы успешно создали учетные записи пользователей с разными уровнями привилегий.
2018-06-08T10:04:01-03:00
Specifying the SSH Public Keys for User Accounts
You can configure an SSH public key to log in using an SSH client without being prompted for a password. You can specify the SSH public key in one of three different formats:
-
Open SSH format
-
IETF SECSH format
-
Public Key Certificate in PEM format
Specifying the SSH Public Keys in Open SSH Format
You can specify the SSH public keys in SSH format for user accounts.
To specify the SSH public keys in open SSH format, generate an SSH public key in open SSH format and perform this task:
SUMMARY STEPS
1. switch# configure terminal
2. switch(config)# username username sshkey ssh-key
3. switch(config)# exit
4. (Optional) switch# show user-account
5. (Optional) switch# copy running-config startup-config
DETAILED STEPS
| Command or Action | Purpose | |
|---|---|---|
|
Step 1 |
switch# configure terminal |
Enters configuration mode.
|
|
Step 2 |
switch(config)# username username sshkey ssh-key |
Configures the SSH public key in SSH format.
|
|
Step 3 |
switch(config)# exit |
Exits global configuration mode.
|
|
Step 4 |
switch# show user-account | (Optional)
Displays the user account configuration.
|
|
Step 5 |
switch# copy running-config startup-config | (Optional)
Copies the running configuration to the startup configuration.
|
The following example shows how to specify an SSH public keys in open SSH format:
switch# configure terminal
switch(config)# username User1 sshkey ssh-rsa AAAAB3NzaC1yc2EAAAABIwAAAIEAri3mQy4W1AV9Y2t2hrEWgbUEYz
CfTPO5B8LRkedn56BEy2N9ZcdpqE6aqJLZwfZcTFEzaAAZp9AS86dgBAjsKGs7UxnhGySr8ZELv+DQBsDQH6rZt0KR+2Da8hJD4Z
XIeccWk0gS1DQUNZ300xstQsYZUtqnx1bvm5Ninn0McNinn0Mc=
switch(config)# exit
switch# show user-account
switch# copy running-config startup-config
| Note |
The username command example above is a single line that has been broken for legibility. |
Specifying the SSH Public Keys in IETF SECSH Format
You can specify the SSH public keys in IETF SECSH format for user accounts.
To specify the SSH public keys in IETF SECSH format, generate an SSH public key in IETF SCHSH format, and perform this task:
SUMMARY STEPS
1. switch# copy server-file bootflash: filename
2. switch# configure terminal
3. switch(config)# username username sshkey file filename
4. switch(config)# exit
5. (Optional) switch# show user-account
6. (Optional) switch# copy running-config startup-config
DETAILED STEPS
| Command or Action | Purpose | |
|---|---|---|
|
Step 1 |
switch# copy server-file bootflash: filename |
Downloads the file containing the SSH key in IETF SECSH format from a server. The server can be FTP, SCP, SFTP, or TFTP.
|
|
Step 2 |
switch# configure terminal |
Enters configuration mode.
|
|
Step 3 |
switch(config)# username username sshkey file filename |
Configures the SSH public key in SSH format.
|
|
Step 4 |
switch(config)# exit |
Exits global configuration mode.
|
|
Step 5 |
switch# show user-account | (Optional)
Displays the user account configuration.
|
|
Step 6 |
switch# copy running-config startup-config | (Optional)
Copies the running configuration to the startup configuration.
|
![Secure shell configuration guide - secure shell version 2 support [cisco cloud services router 1000v series] - cisco](https://wudgleyd.ru/wp-content/uploads/6/6/b/66b494c6ea532d083f9ad0d868a57388.png)
![Secure shell configuration guide, cisco ios release 15s - secure shell version 2 support [support] - cisco](https://wudgleyd.ru/wp-content/uploads/9/d/0/9d00606131c576d2761559e9a6ab361a.jpeg)


![Secure shell configuration guide, cisco ios xe 17 - secure shell version 2 support [support] - cisco](https://wudgleyd.ru/wp-content/uploads/4/6/a/46a9c497bf84657e9d1b98fe58a3aeee.png)
![Secure shell configuration guide, cisco ios release 15s - configuring secure shell [support] - cisco](https://wudgleyd.ru/wp-content/uploads/7/f/7/7f7bc490279ef830db2c57570ab2eb16.jpeg)
The following example shows how to specify the SSH public keys in the IETF SECSH format:
switch#copy tftp://10.10.1.1/secsh_file.pub bootflash:secsh_file.pub
switch# configure terminal
switch(config)# username User1 sshkey file bootflash:secsh_file.pub
switch(config)# exit
switch# show user-account
switch# copy running-config startup-config
Overview
Older IOS images on Cisco devices used telnet as default login method for the vty lines. Nowadays using telnet is not safe because all traffic including usernames and passwords is transmitted in clear text. This way anybody using a protocol analyzer can gain access to the data. Lately telnet access method has been replaced by SSH which offers increased security by encrypting all traffic between source and destination. SSH protocol comes in two versions SSH1 and SSH2. Communication between the client and server is encrypted in both versions. You should implement SSH version 2 when possible because it uses a more enhanced security encryption algorithm. SSH1 became available in Cisco’s IOS, starting with release 12.1(1)T. In order to use SSH2 you need a IOS version 12.3(4)T or newer.
Ну и на сладенькое: сброс пароля
Практически на любом сетевом устройстве есть возможность сбросить пароль, имея физический доступ. Если сделать это невозможно или это отдельная платная услуга, то скорее всего в ваших руках находится какая-то русская поделка (не в обиду, конечно, нашим производителям, но дважды я такие строки читал в документации:))
Итак, cisco:
подключаетесь к устройству консольным кабелем,
отправляете его в ребут (хоть по питанию, хоть командой )
в этом режиме введите команду: , она заставит устройство игнорировать startup-config при загрузке.
введите для перезагрузки
после загрузки running-config будет девственно чистым, а startup-config содержит по-прежнему последнюю сохранённую конфигурацию
Сейчас самое время поменять пароль или слить конфиг.
самое важное: верните обратно регистры:. Если вы этого не сделаете, то вся ваша конфигурация будет актуальна до первого ребута)
И хорошо, если это устройство стоит рядом, и вы вспомните, что накосячили. Мне не повезло)
Если вы этого не сделаете, то вся ваша конфигурация будет актуальна до первого ребута). И хорошо, если это устройство стоит рядом, и вы вспомните, что накосячили. Мне не повезло)
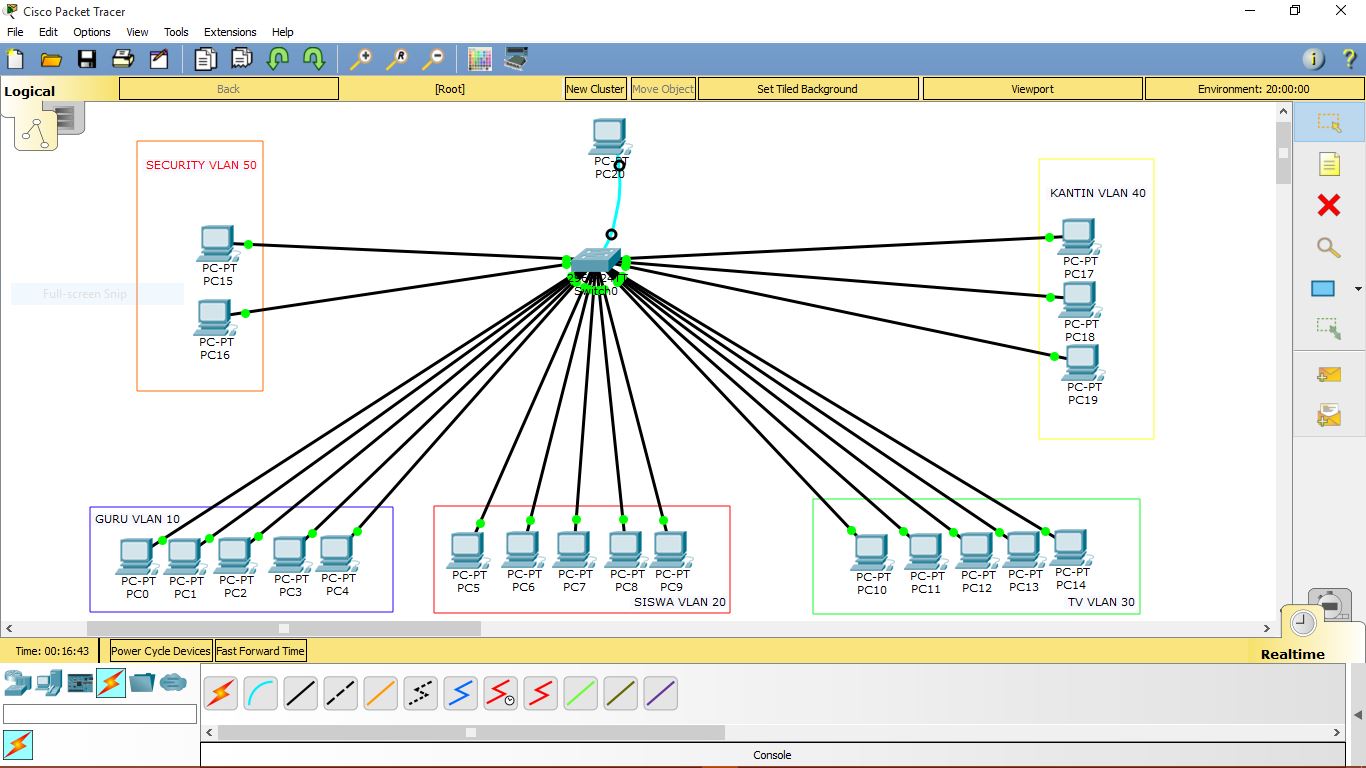
В следующей статье мы обратимся к вланам и локальной сети. Обязательно к прочтению:
Настройку ssh доступа на оборудование cisco
Заходим в привилегированный режим.
router>enable
Настраиваем параметры необходимые для генерации ключа используемого ssh.
Устанавливаем точную текущую дату и время.
router#clock set 15:00:00 15 May 2018
Входим в режим конфигурирования.
cisco#configure terminal
Задаем домен, если у вас нет домена можно указать любой домен например cisco.com.
cisco(config)#ip domain name mydomain.ru
Задаем имя роутера.
cisco(config)#hostname mycisco
Задаем версию протокола ssh. Рекомендуется версия 2.
mycisco(config)# ip ssh version 2
Задаем количество попыток подключения по ssh.
mycisco(config)# ip ssh authentication-retries 2
Задаем хранение пароли в зашифрованном виде.
mycisco(config)#service password-encryption
Включаем протокол aaa.
mycisco(config)#aaa new-model
Создаем пользователя admin с паролем qwerty и максимальными уровнем привелегий 15.
mycisco(config)#username admin privilege 15 secret qwerty
Задаем пароль qwerty для привилегированного режима.
mycisco(config)#enable secret qwerty
Генерируем rsa ключ для ssh длиной желательно не менее 1024.
mycisco(config)#crypto key generate rsa
The name for the keys will be:
Choose the size of the key modulus in the range of 360 to 4096 for your
  General Purpose Keys. Choosing a key modulus greater than 512 may take
  a few minutes.
How many bits in the modulus :1024
Разрешаем доступ по ssh только из определенной сети (192.168.1.0/24).
mycisco(config)#access-list 23 permit 192.168.1.0 0.0.0.255
Входим в режим конфигурирования терминальный линий.
mycisco(config)#line vty 0 4
Разрешаем доступ только по ssh.
mycisco(config-line)# transport input ssh
По умолчанию журнальные сообщения могут выводиться в независимости от того набирает пользователь какие либо команды или нет, прерывая исполнение текущих команд. Включая logging synchronous маршрутизатор начинает дожидаться завершения текущей команды и вывода ее отчета.
mycisco(config-line)# logging synchronous
Позволяем входить сразу в привилигированный режим.
mycisco(config-line)# privilege level 15
Включаем автоматическое закрытие ssh сессии через 30 минут.
mycisco(config-line)# exec-timeout 30 0
Привязываем группу доступа, созданную на шаге 10, к терминальной линии.
mycisco(config-line)# access-class 23 in
Выходим из режима конфигурирования.
mycisco(config-line)# end
Сохраняемся.
mycisco# copy running-config startup-config
Вот и все, включение ssh на оборудование Cisco закончено.
Objective
This article provides instructions on how to configure server authentication on a
managed switch, not how to connect to the switch. For an article on connecting to a switch via SSH + Putty,
please click here to view that article.
Secure Shell (SSH) is a protocol that provides a secure remote connection to specific
network devices. This connection provides functionality that is similar to a Telnet connection, except that it
is encrypted. SSH allows the administrator to configure the switch through the command line interface (CLI) with
a third party program.The switch acts as an SSH client that provides SSH capabilities to the users within the
network. The switch uses an SSH server to provide SSH services. When SSH server authentication is disabled, the
switch takes any SSH server as trusted, which decreases security on your network. If SSH service is enabled on
the switch, security is enhanced.
Objective
The Cisco Business Managed Switches can be remotely accessed and configured
through the Command Line Interface (CLI). Accessing the CLI allows commands to be entered in a terminal-based
window. If you prefer to configure using terminal commands on your switch through the CLI rather than the
web-based utility, this would be an easier alternative. Certain tasks such as Layer 3 mode enabling can only be
performed through the CLI.
In order to remotely access the CLI of your switch, you must use an SSH or Telnet
client. You must also enable the Telnet and SSH service on your switch first before you can access it remotely.
Note: For instructions on how to configure the Transmission Control Protocol
(TCP) and User Datagram Protocol (UDP) settings on your switch, click here.
This article provides instructions on how to access the CLI of your switch through SSH
or Telnet using the following clients:
- PuTTY — A standard Telnet and SSH client. You can download an installer here and install in your Windows computer.
- Terminal — An application that is pre-installed in every Mac OS X computer. It is also known as the shell or
the console.
Important: Before you make an SSH or Telnet connection to the switch, you must
set the IP address for the switch. For instructions, click here.
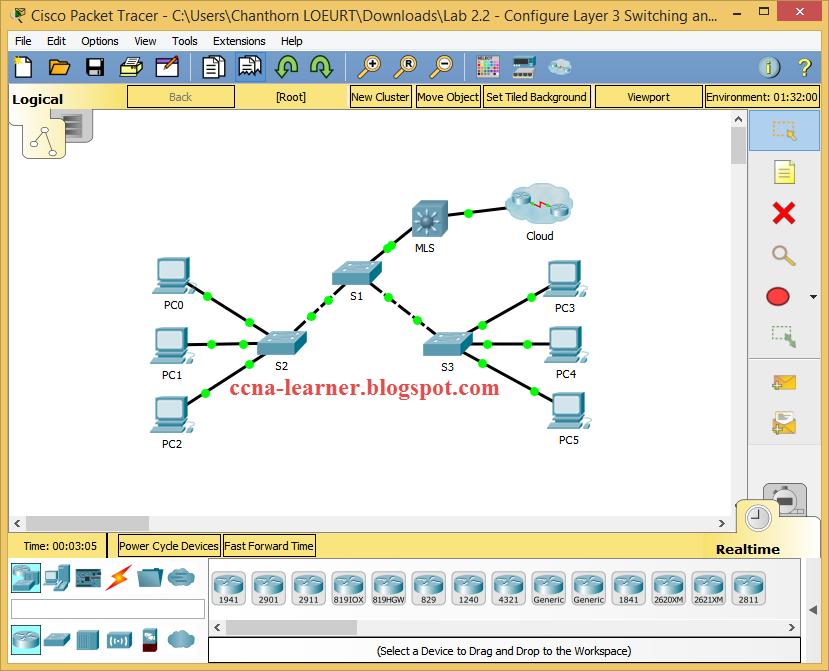
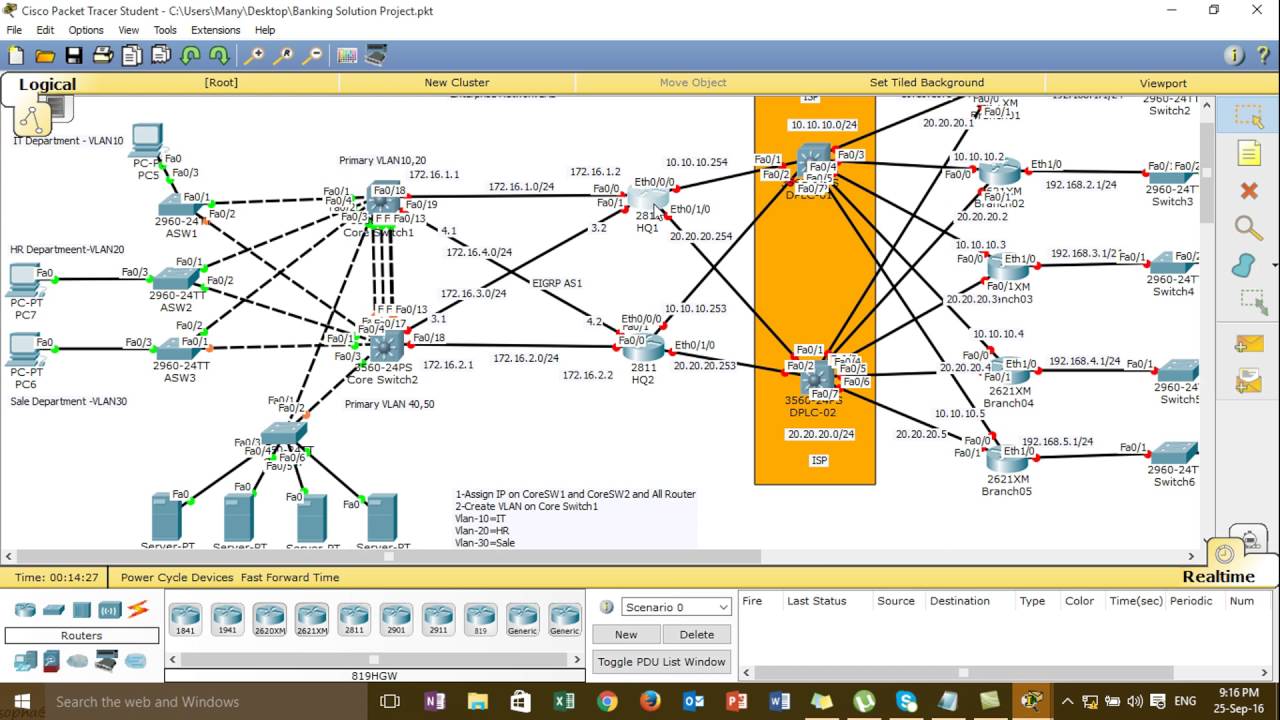
Среда
Начнём с того, в какой среде будем работать.
В данный момент есть два известных пакета программ, позволяющих моделировать сеть, построенную на оборудовании Cisco:
- цисковский же продукт Packet Tracer, который по идее свободно не распространяется. Это эмулятор и имеет лишь некоторые функции Cisco IOS. Вообще говоря, он сильно ограничен и многие вещи в нём реализованы лишь отчасти. Никаких тонких настроек. С другой стороны к настоящему моменту версия 5.3.2 поддерживает создание GRE-туннелей, протоколов динамической маршрутизации (и в их числе даже BGP!). Притом он очень прост в освоении и имеет в своём арсенале сервера (FTP, TFTP, DHCP, DNS, HTTP, NTP, RADIUS, SMTP, POP3), рабочие станции и свичи. Сейчас уже есть под Linux, хотя в былые времени он прекрасно запускался и из-под Wine.
- распространяемый по лицензии GNU GPL симулятор GNS3. В этом пакете необходимо загружать настоящие образы Cisco IOS. С одной стороны это плюс – вы работаете с настоящим интерфейсом cisco и ограничены лишь своей фантазией, существующими стандартами и производительностью рабочей станции, с другой, во-первых, эти IOS ещё нужно суметь достать, во-вторых, это более сложный продукт для понимания, и в-третьих, в нём есть только маршрутизаторы и «типа» коммутаторы.
Я считаю, что для знакомства с принципами лучше начать всё же с Packet Tracer’a, а потом переходить на тяжёлую артиллерию по мере надобности. Все мы не дети малые, где взять то, что нам нужно, рассказывать не будем.
Prerequisites
Requirements
The Cisco IOS image used must be a k9(crypto) image in order to support SSH. For example c3750e-universalk9-tar.122-35.SE5.tar is a k9 (crypto) image.
Components Used
The information in this document was created from the devices in a specific lab environment. All of the devices used in this document started with a cleared (default) configuration. If your network is live, ensure that you understand the potential impact of any command.
The information in this document is based on Cisco IOS 3600 Software (C3640-IK9S-M), Release 12.2(2)T1.
SSH was introduced into these Cisco IOS platforms and images:
- SSH terminal-line access (also known as reverse-Telnet) was introduced in Cisco IOS platforms and images start in Cisco IOS Software Release 12.2.2.T.
-
SSH Version 2.0 (SSH v2) support was introduced in Cisco IOS platforms and images start in Cisco IOS Software Release 12.1(19)E.
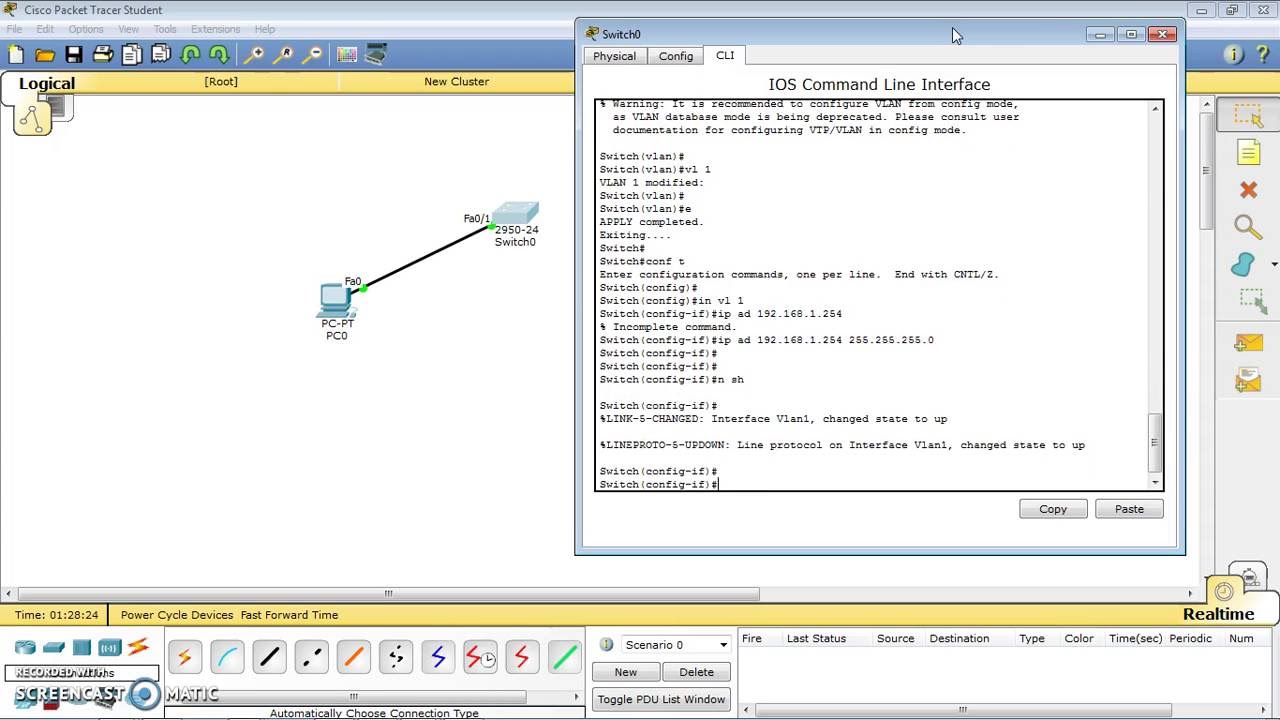
Настройка доступа по Telnet
Из этого-то режима мы и настроим интерфейс для подключения компьютера через telnet. Команда для перехода в режим конфигурации интерфейса FastEthernet 0/0:
По умолчанию все интерфейсы отключены (состояние administratively down). Включаем интерфейс:
Настроим IP-адрес:
— означает “выключить интерфейс”. Соответственно, если вы хотите отменить действие команды, то используйте слово перед ней. Это правило общее для CLI и применимо к большинству команд.
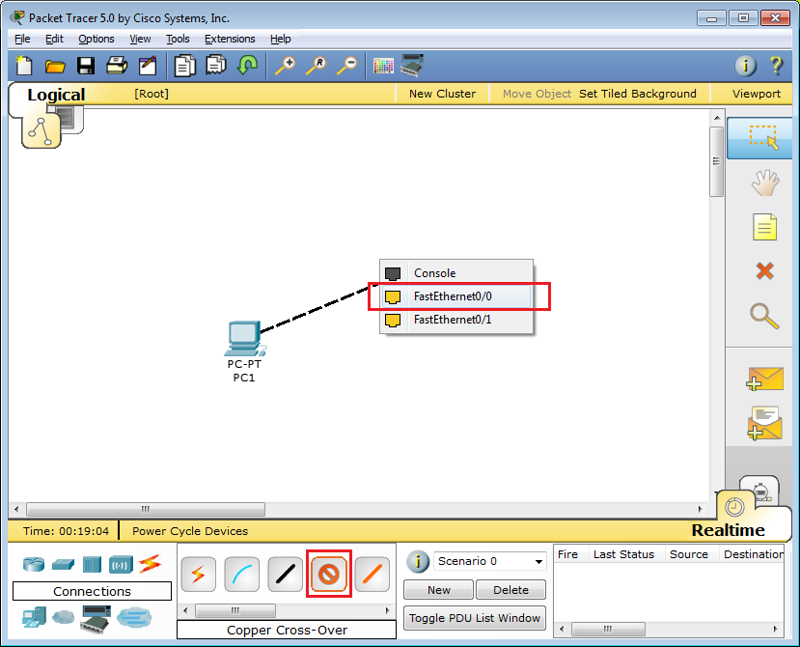 Подключение к маршрутизатору через Ethernet
Настраиваем IP-адрес компьютера через Desktop.
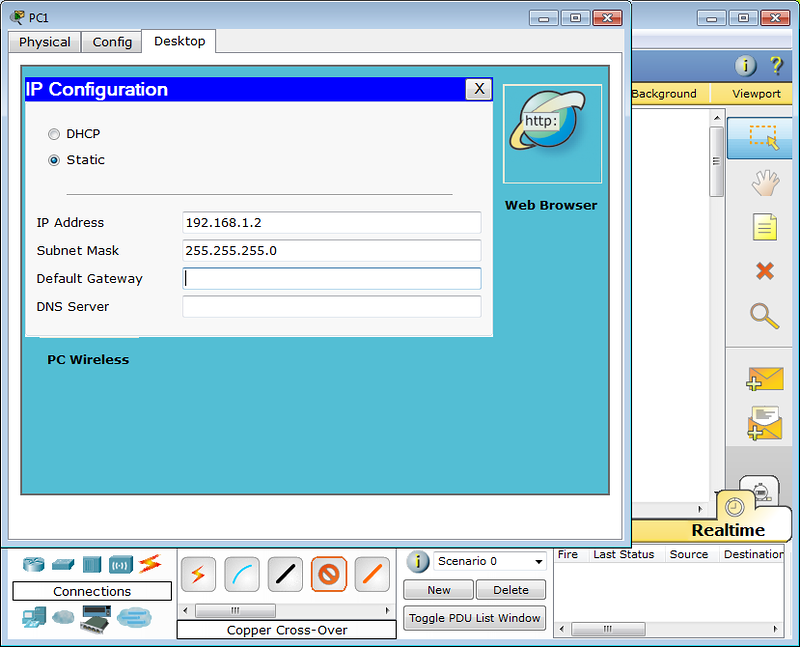 Настройка IP адреса компьютера
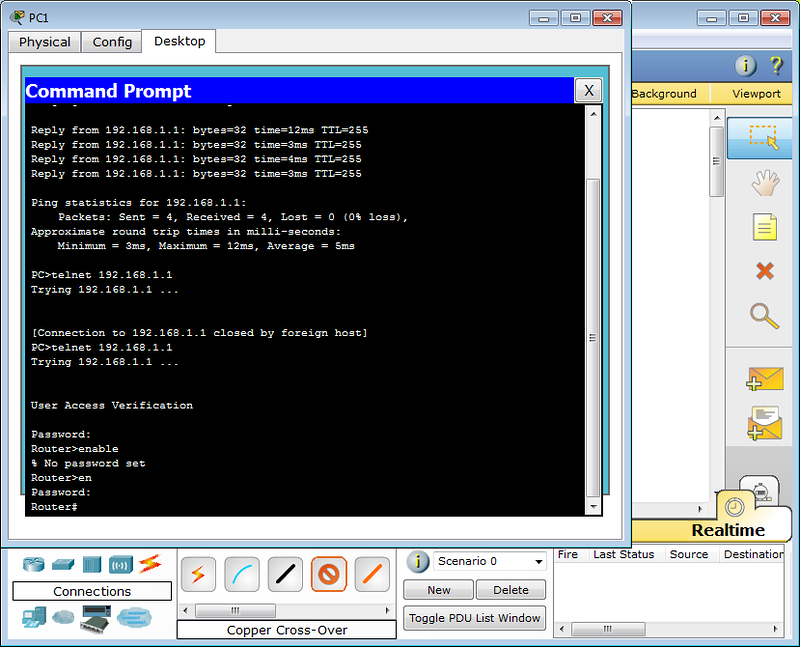
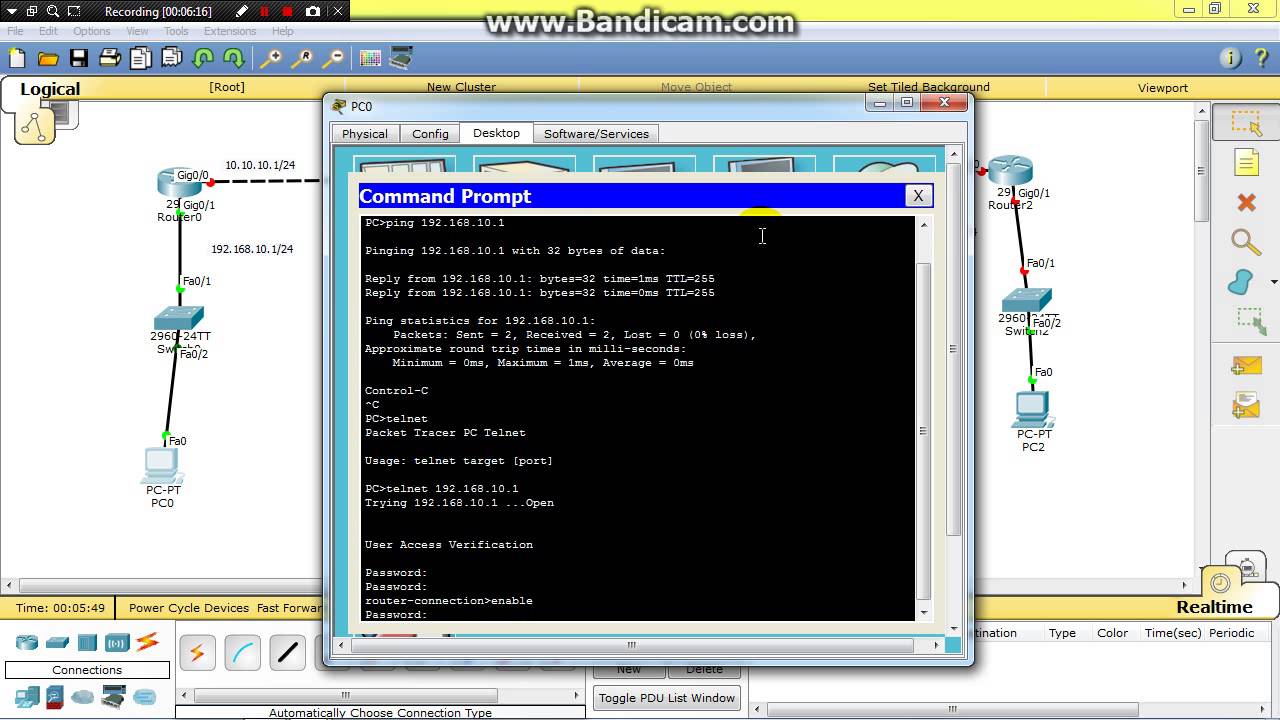
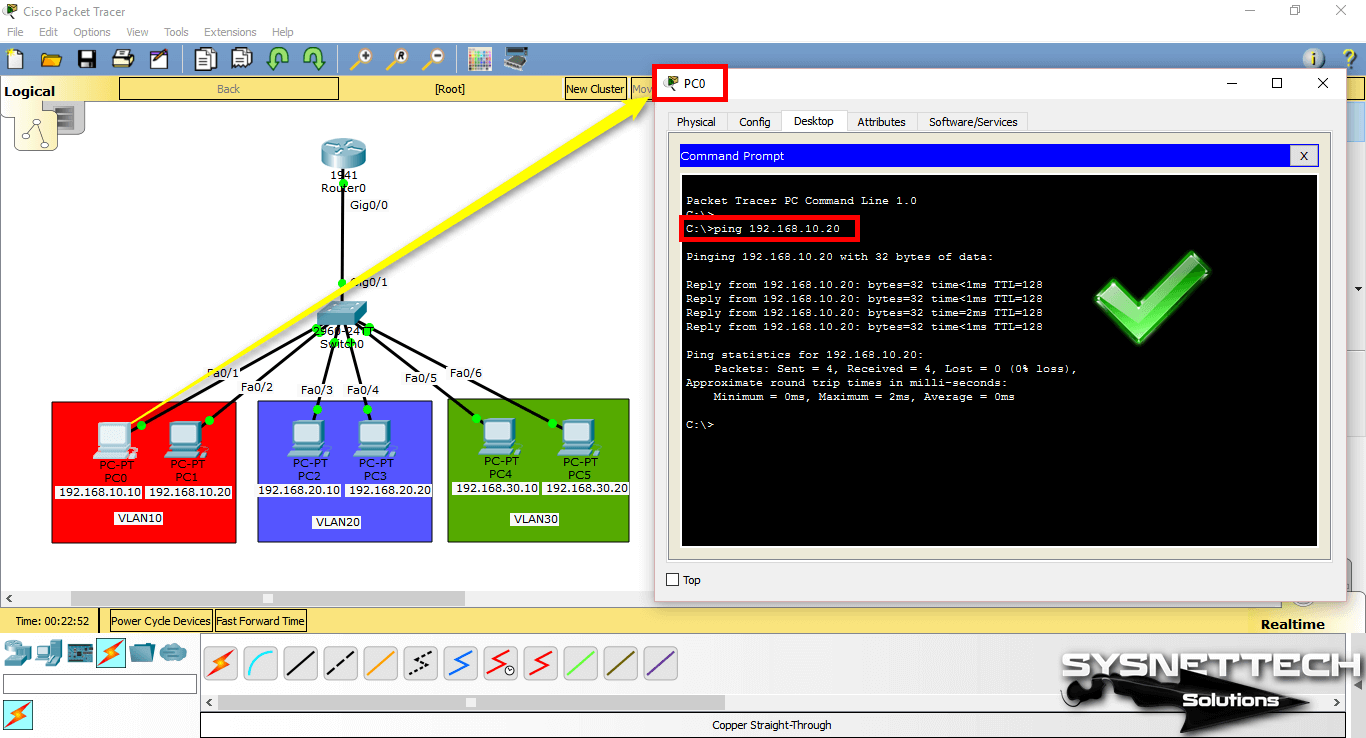
И пробуем подключиться, выбрав Command Prompt в панели Desktop:
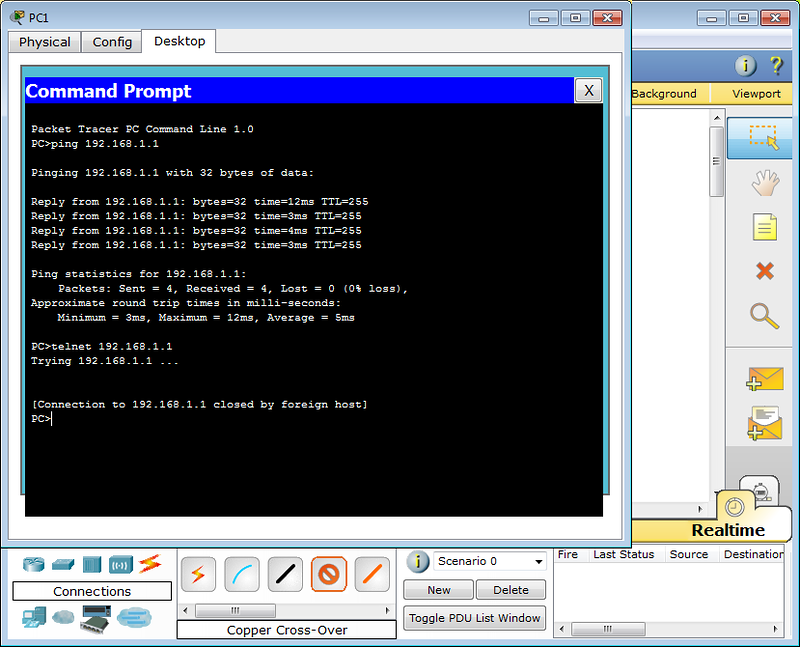 Подключение к маршрутизатору через telnet
Как и ожидалось, циска не пускает без пароля. В реальной жизни обычно выдаёт фразу “Password required, but none set”
Способы подключения
В Packet Tracer’e управлять оборудованием можно следующими способами:
- терминальное подключение с рабочей станции через консольный кабель;
- telnet;
Интерфейс последних трёх идентичный – отличается лишь способ подключения. Разумеется, GUI – не наш метод.


В реальной же жизни доступны:
- Telnet/ssh
- Терминальное подключение с рабочей станции через консольный кабель
Последний вариант даже не упоминайте в приличном обществе. Даже если вы адепт мыши и браузера, очень не советую. На своём примере при работе с другим оборудованием я сталкивался с тем, что настроенное через веб не работает. Хоть ты тресни, но не работает. А у того же длинка вообще был баг в одной версии прошивки для свичей: если изменить настройки VLAN в веб-интерфейсе из под линукс, то свич становится недоступным для управления. Это официально признанная проблема).
Objective
Secure Shell (SSH) is a protocol that provides a secure remote connection to specific network devices. This connection provides functionality that is similar to a Telnet connection, except that it is encrypted. SSH allows the administrator to configure the switch through the command line interface (CLI) with a third party program.
In CLI mode via SSH, the administrator can execute more advanced configurations in a secure connection. SSH connections are useful in troubleshooting a network remotely, in cases where the network administrator is not physically present at the network site. The switch lets the administrator authenticate and manage users to connect to the network via SSH. The authentication occurs via a public key that the user can use to establish an SSH connection to a specific network.
The SSH client feature is an application that runs over the SSH protocol to provide device authentication and encryption. It enables a device to make a secure and encrypted connection to another device that runs the SSH server. With authentication and encryption, the SSH client allows for a secure communication over an unsecure Telnet connection.
This article provides instructions on how to configure client user authentication on a managed switch.
![Настройка свитчей d-link через cli [база знаний - онлайн север]](http://wudgleyd.ru/wp-content/uploads/4/0/9/409a274206d502c9ea4d9d2831380551.png)
